
Geometry Nodes 3D Gizmo Inputs
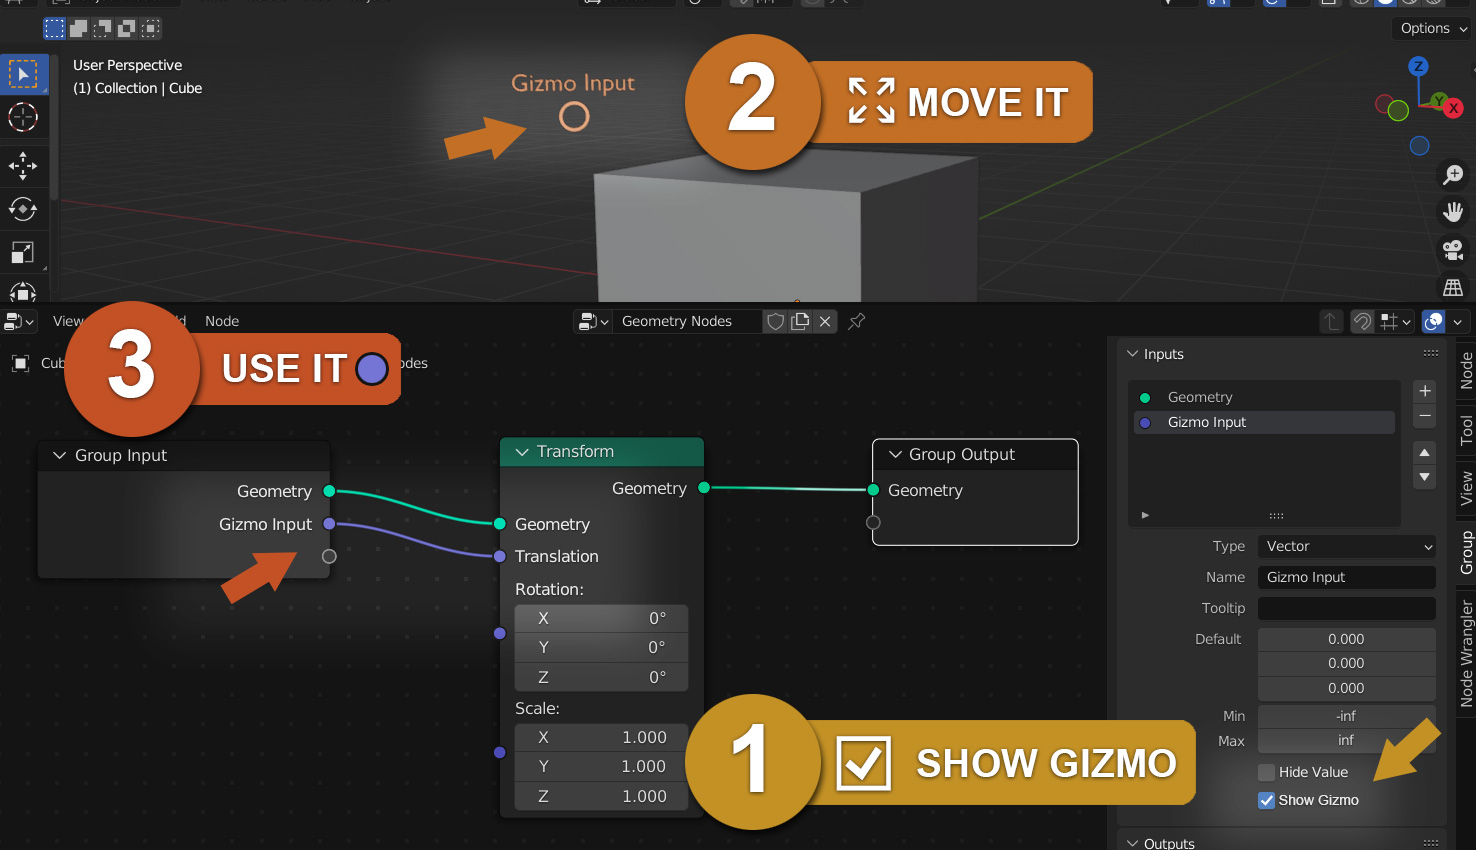
Turn any geometry node input into a 3D gizmo input!
Tick a box, position the gizmo in the 3D viewport and use the value in your nodetree.
Advantages Over Empties
Advantage 1: Faster!
If your geometry nodes setup requires a lot of empties for control, as many as a dozen, creating empties for each one is a time consuming hassle.
With 3D gizmos driven by the geometry node setup itself, you can drag and drop your GN nodetree onto an object from the asset browser, and you're done, just select the object, move the gizmos around immediately.
Advantage 2: Harder to lose
Geometry node setups dependent on empties to control their properties are vulnerable to 'losing' their empties, if you transfer/append objects between scenes and forget to bring in the empties with them. Not an issue with 3D Gizmos, they're part of the GN setup.
Advantage 3: Less Visual Clutter
If you have hundreds of objects in your scene, driven by dozens of empties at the same time, each empty parented to the object it influences, your scene will be a visual cluttered mess.
3D Gizmos are only displayed on your currently selected objects, making it easier to focus on your task at hand.
Additionally they aren't objects, so they won't clutter your outliner either!
Advantage 4: Defaults
3D Gizmos can have default values, so as soon as you apply a new geometry node modifier to an object, the 3D gizmos are already set in default positions for fine tuning.
Ideas for Improvement
Many Gizmo Inputs
3D Gizmos could provide more than just position data. They could provide Position, Rotation, Scale, in both relative and world coordinates and much more. Floating colour inputs? Text boxes? Tick boxes? The sky is the limit.
Gizmo Control Options
Gizmos could potentially have per-gizmo options for how they are to be used. Such as setting a gizmo to always default to snapping to a grid, or snapping to a surface.
1 Comment
How did you send the picture? Why did I send it?