
Chamfering the model causes a UV issue
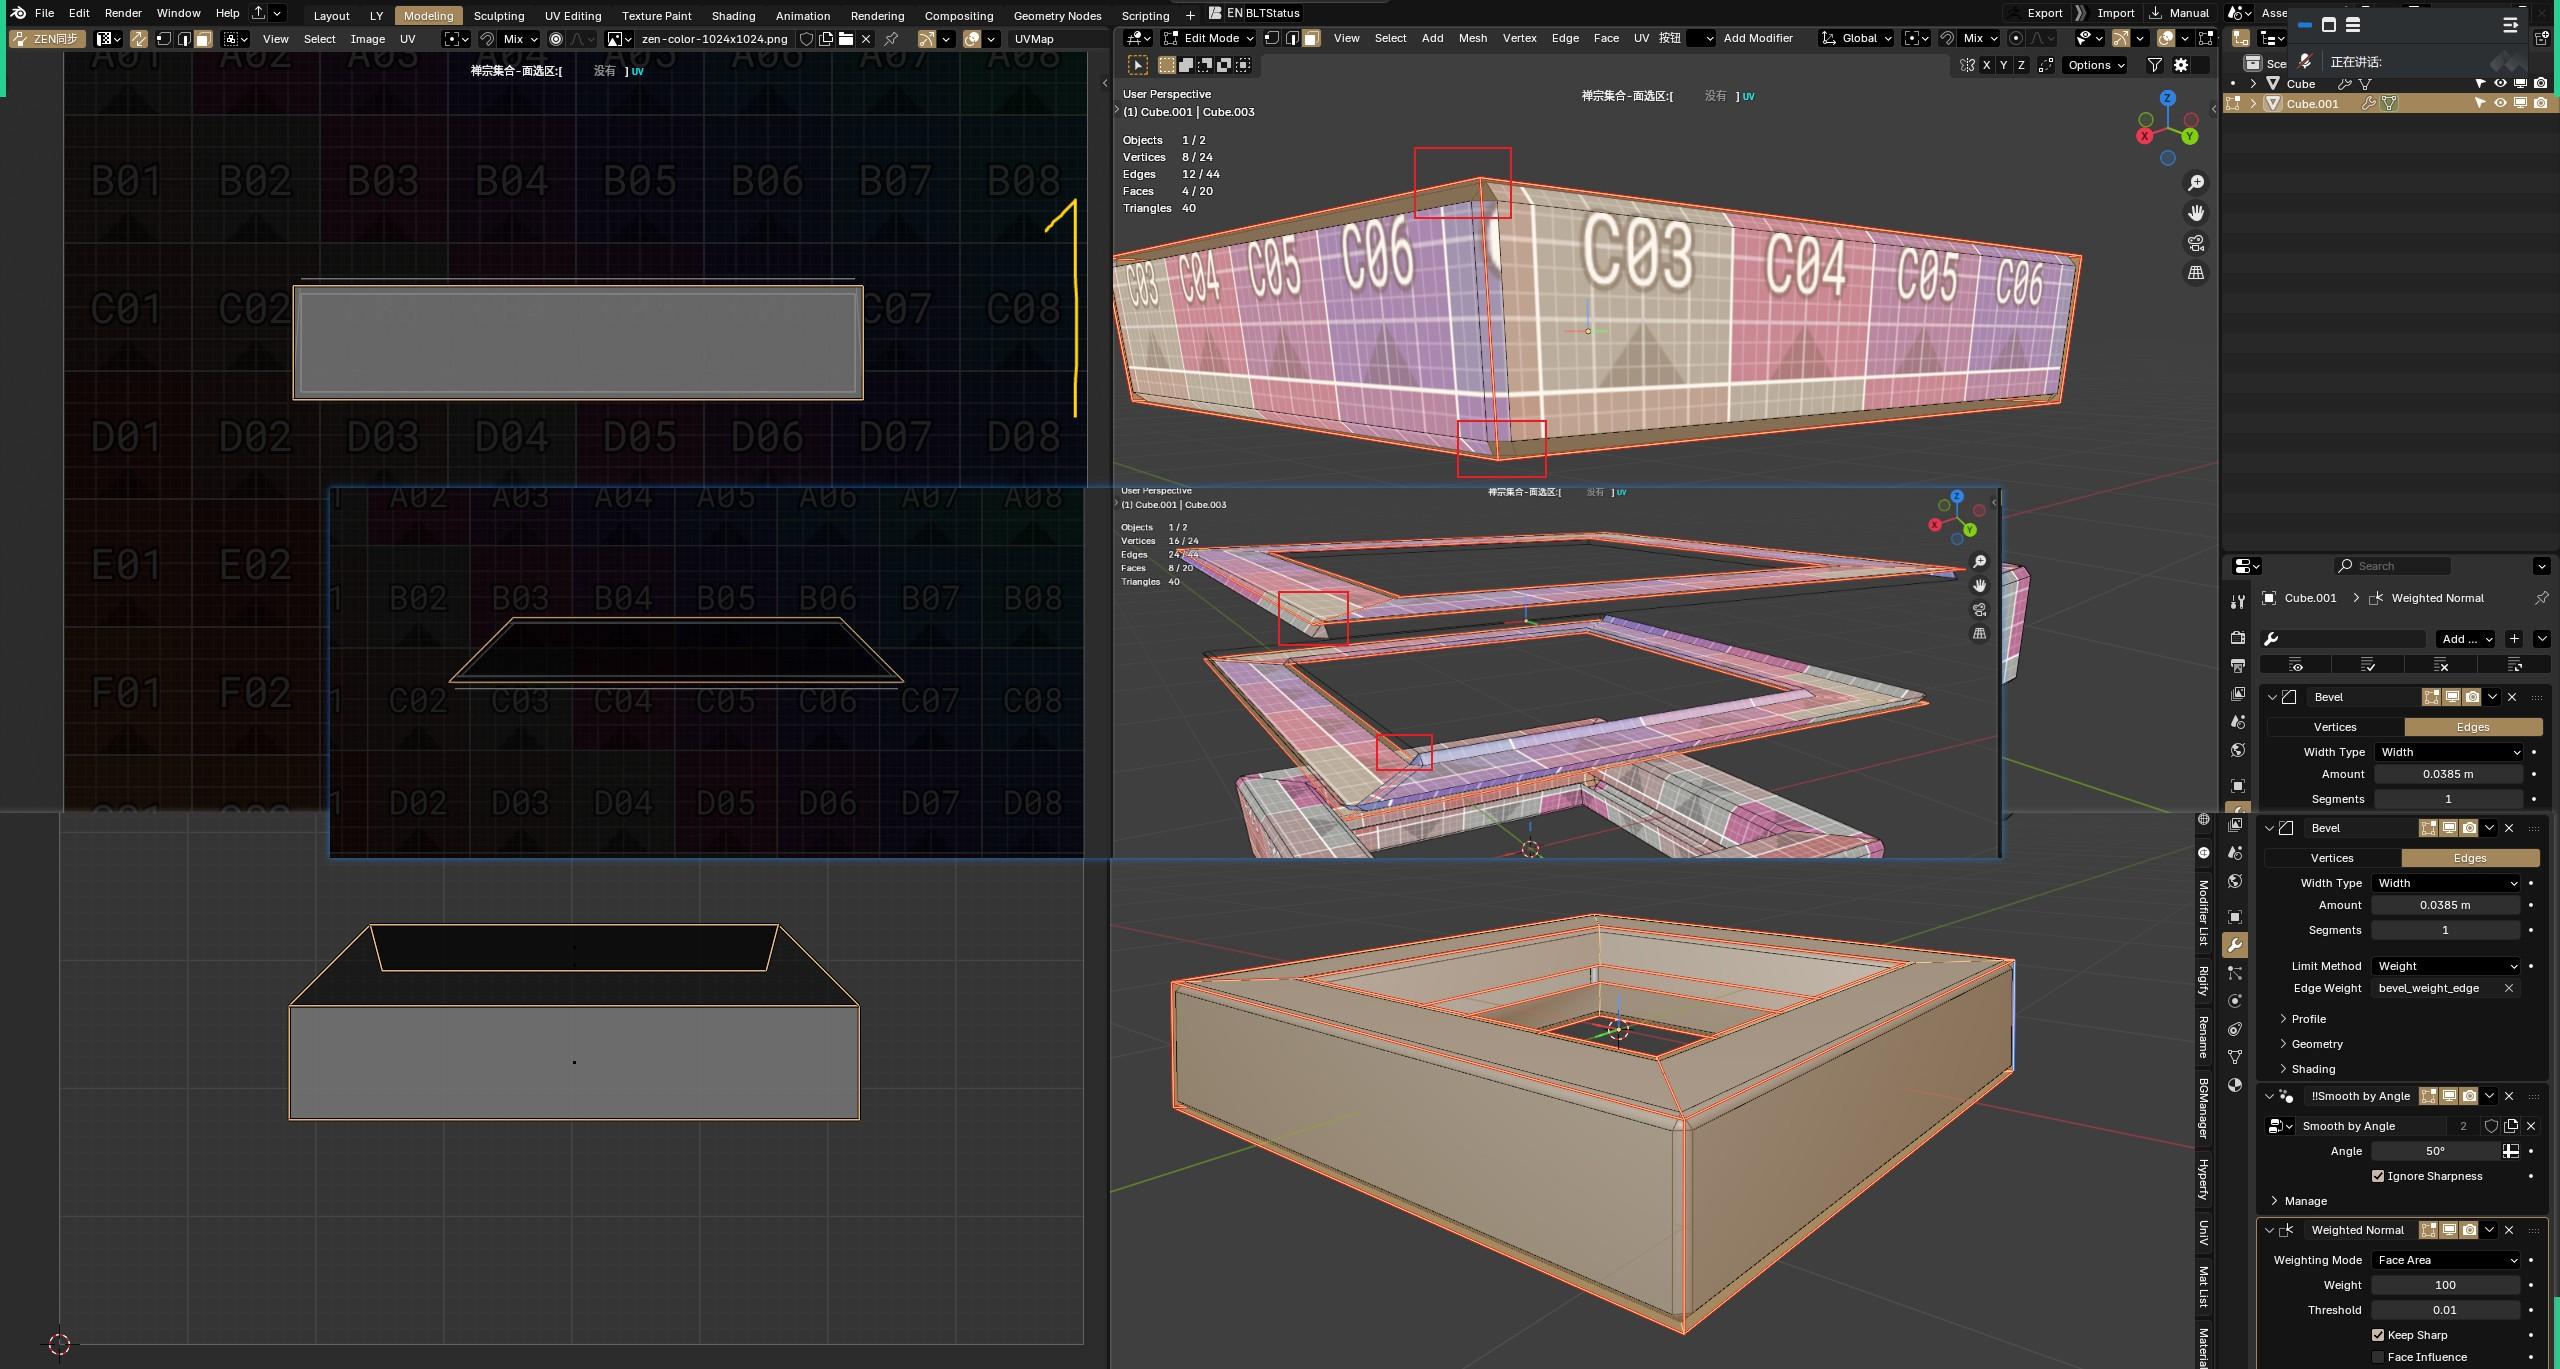
As shown in Figure 1, after adding a Bevel modifier to the model, the new UV islands generated by the bevel are randomly assigned among the adjacent faces of the original mesh. Some are assigned to the faces above, while others are assigned to the faces below. It is completely inconsistent. This is a huge pain to adjust and results in a terrible experience when working with textures—yes, a really terrible experience.
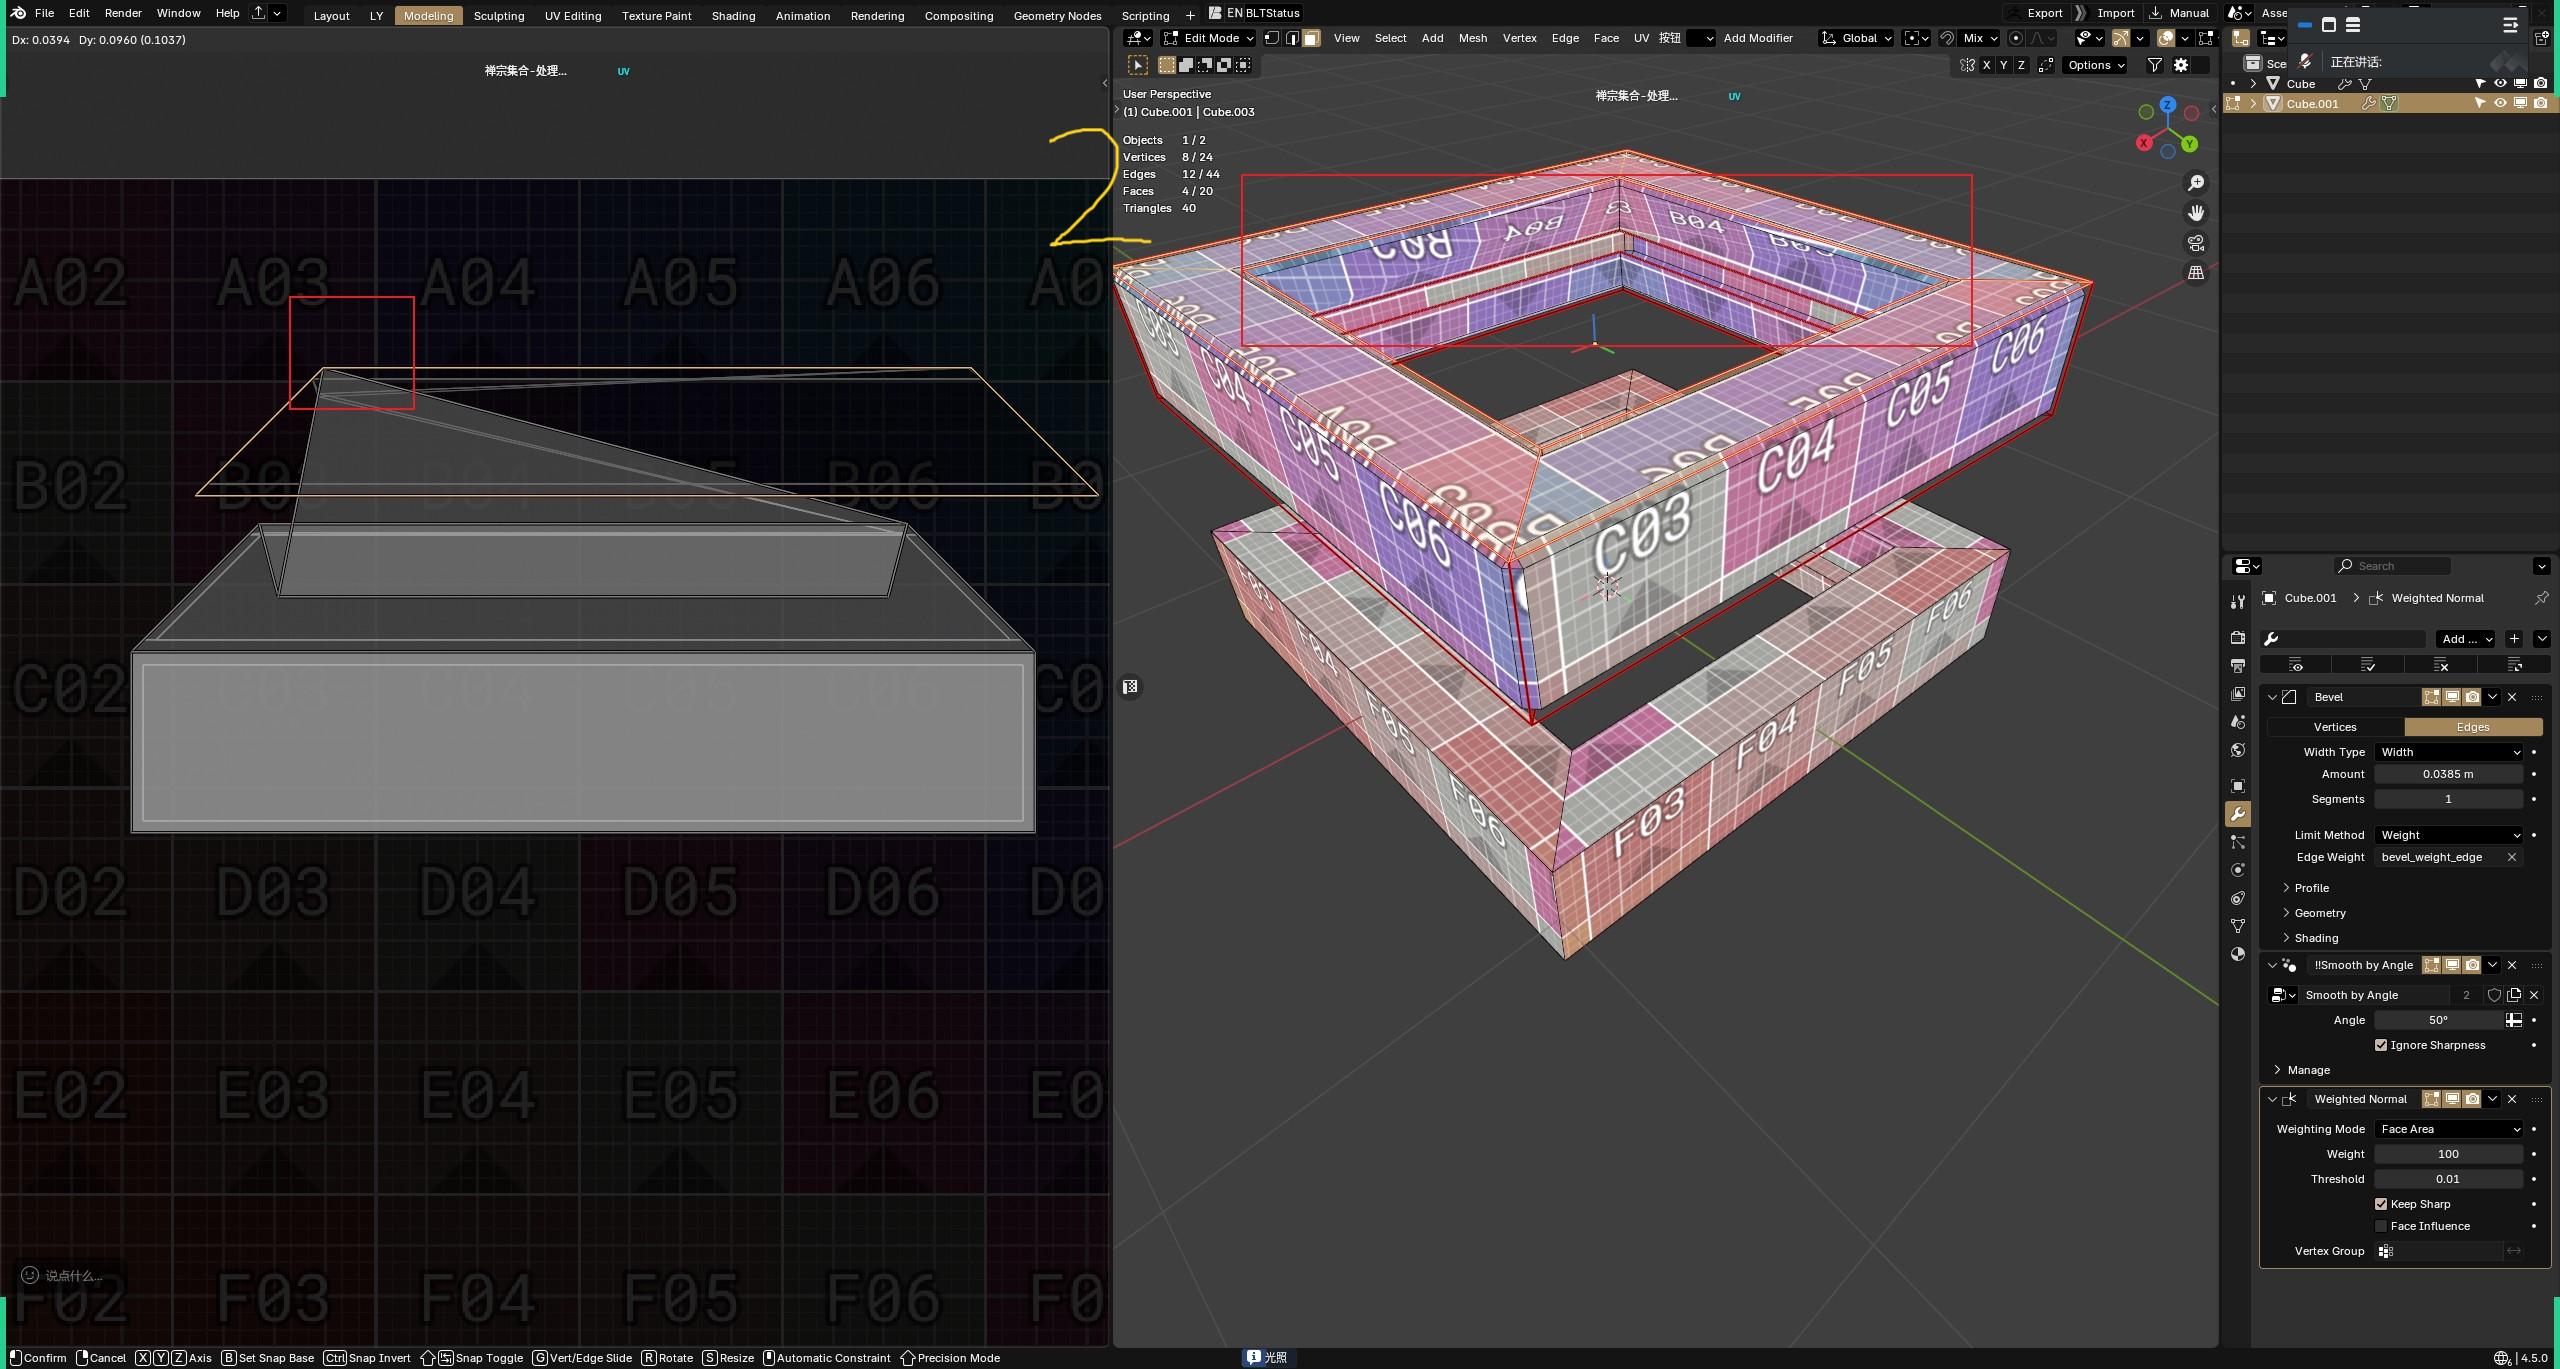
Additionally, there is something very strange that I don't understand: why do the UV vertices automatically merge? As shown in Figure 2. It's just too weird.
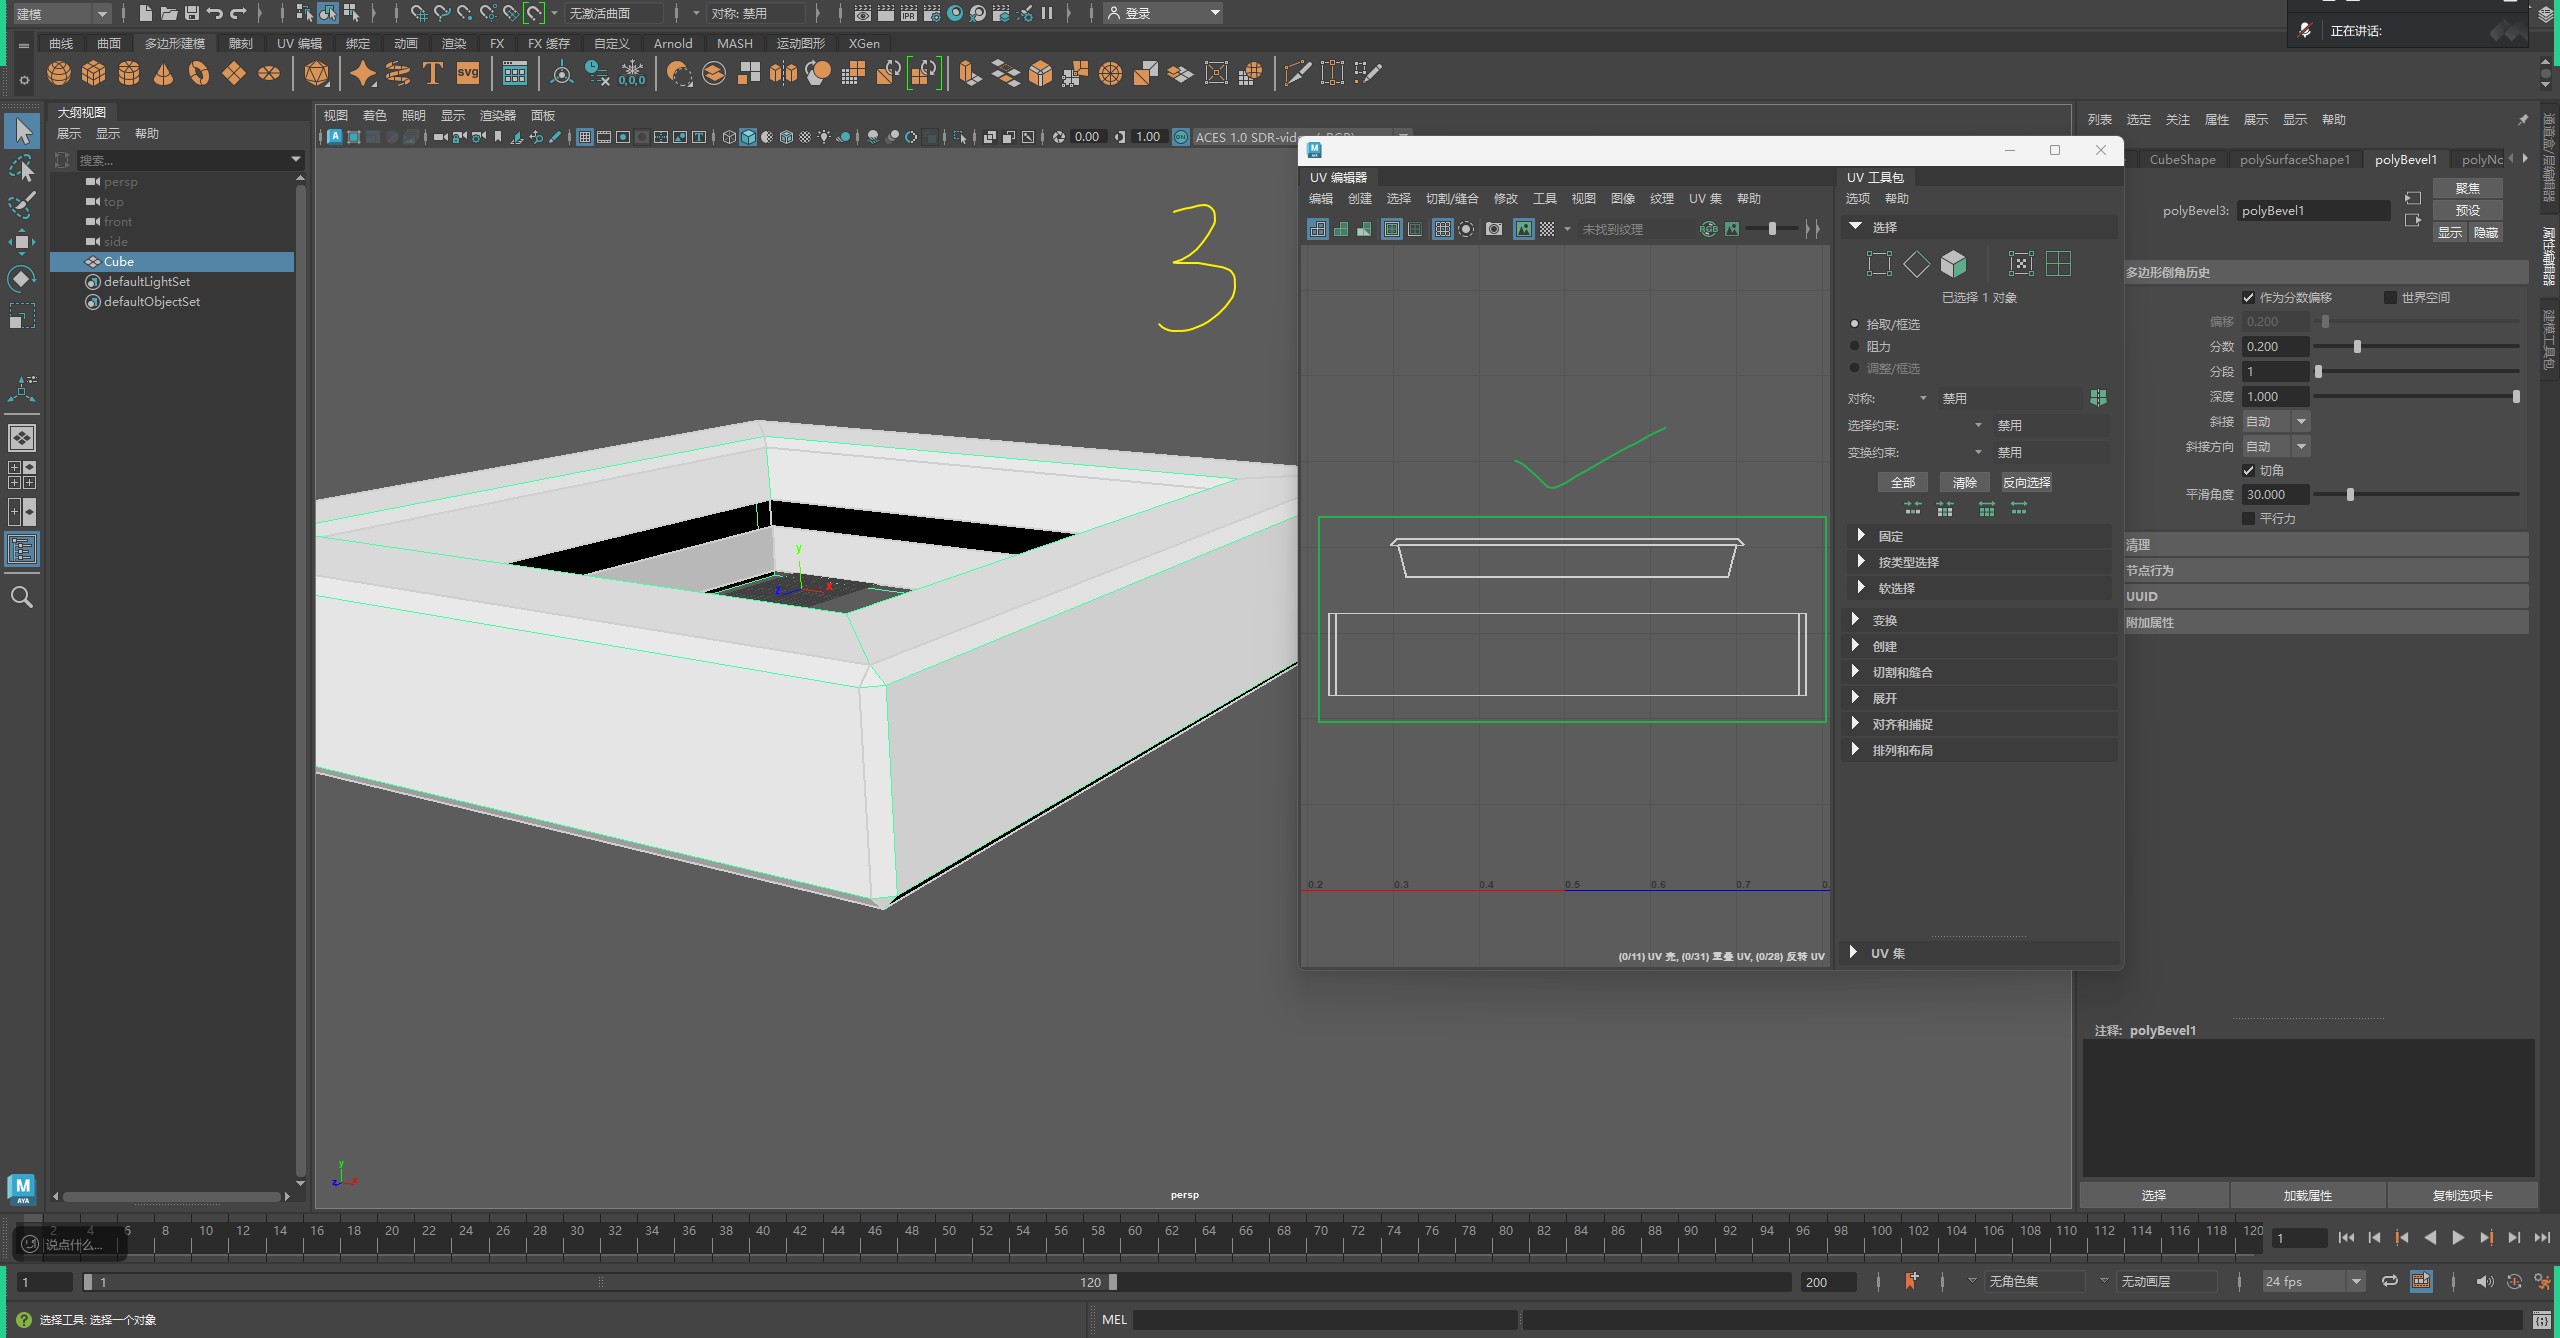
Finally, Figure 3 is a screenshot of the same operation performed in Maya. As you can see, in Maya, after beveling the model, the generated UV islands are uniformly assigned to a specific face. Because of this difference, in my current workflow, after finishing a scene in Blender, I have to import the model into Maya just to perform the beveling operation.
3 Comments
Blender's bevel is currently undergoing a rewrite , which is planned to fix many long standing issues with beveling, hopefully including your issue.
if it is happening then i can say it should be fixed.
So it would be great if the new surface generated after chamfering could freely choose which side to connect to. But it seems no one cares about this issue.