
Parallax Occlusion Maps to make Sculpt Mode lighter
I'm breaking this idea of another post
I seriously think about how it could be done to make Blender perform as well as Z-Brush in sculpture mode. And I would like to ask you all as well.
Anyway, I knew I would find something. Besides I do not understand so much of the programming in computer graphics, I have difficulty remembering the names and terms used. In this case, one of the important is the parallax occlusion map. From what I understand it can generate illusions of polygonal surfaces with a very high level of quality. And it even seems to me that it can display the texture off the edge of polygons, creating borders with textures, which is an important point.
The idea would be to use this to visualize various details made in the sculpt mode. I believe that Blender could gain a lot in performance because it would not have to use so many polygons. It would not be like ZBrush, of course, but it would gain performance.
Below are examples of parallax occlusion maps with silhouettes:
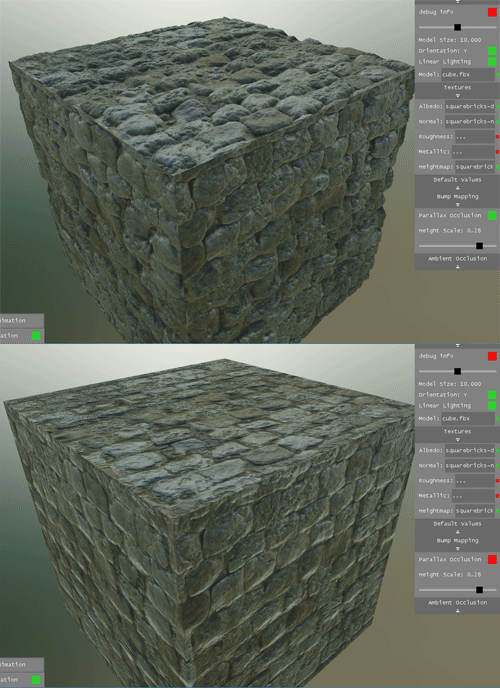
chetanjags.wordpress.com/2013/05/10/parallax-occlusion-mapping-with-silhouettes/

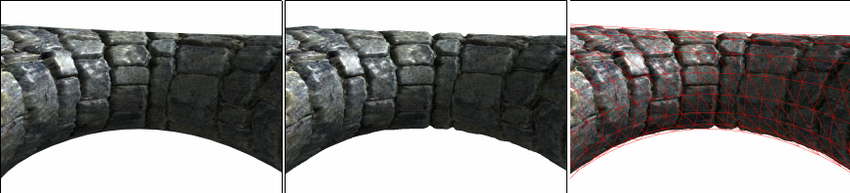
Another technique is the relief:

And as this would be necessary to use textures, and therefore, a UV mapping. I figured it would be necessary to have an automated mapping option that could later be transferred to a quality mapping done by you manually.
Edit: I can see two problems with this concept:
First, how could Blender prioritize the dynamic topology and this version of 2.5D sculpture? For the texture should always be applied, unless there is no polygon volume for it. Then the dynamic topology comes into play. Always trying to maintain an adequate level of polygons.
Second, when you deform the polygon mesh that has the POM texture or Relief applied you deform the texture as well. Therefore, a method would still be needed for the texture to readapt to the new mesh without changing the final result.
Unfortunately, my inception with programming compromises my ability to see solutions to these problems.
5 Comments
Interesting concept UE4 uses a POM technique called PDO (Pixel Depth Offset) Its similar to displacement but it displaces Pixels instead of dense mesh
twitter.com/TomShannon3D/status/973222600989175808
* @Reoxur * Dude, I was looking at what you gave me on this link, and I have to ask, This method allows the pixels of the image to stay out even from the mesh surface of the model ?! Creating a silhouette that is able to come off the edges?
* @thiagocavalcantecarvalho * Exactly Its basically Displaced mesh, but pixels I tested in UE4 and it looks like any old dense displaced mesh
Just dont go too close or you'll see the pixels lol, pixel layers. But thats kind of controlled by how many layers you want it to have. Going over 500 layers kind of lags a bit so that'd probably be best for Only when rendering
POM requires a texture, and thus UVs to work (in addition to a fairly expensive shader). You can technically already do this using Eevee, just set up your POM shader and paint your displacement texture in black and white like you're using a sculpt brush.
Guys, I'm trying to prepare a simple mock-up here but I'm having trouble adding images. How do I do this? Do you have any pages teaching?