
Super Fast Stereoscopic rendering
3D Rendering in a snap
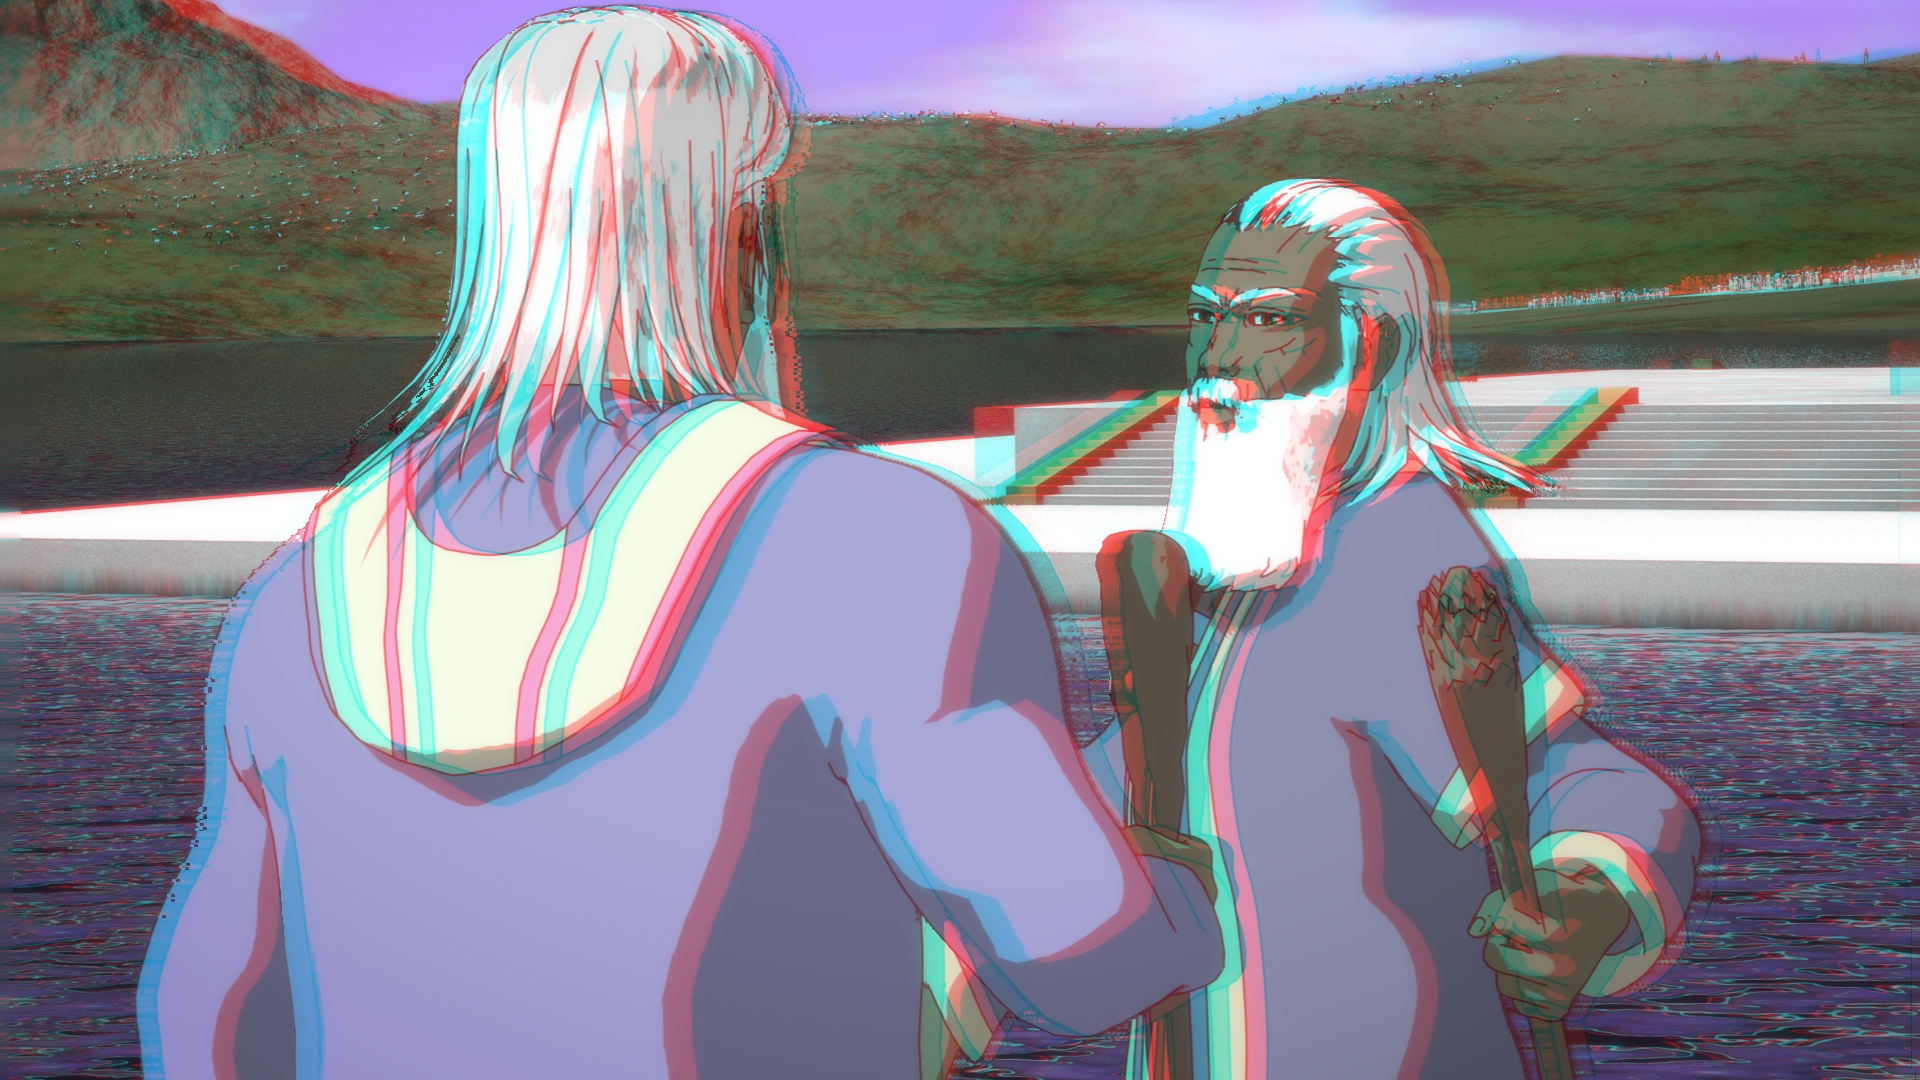
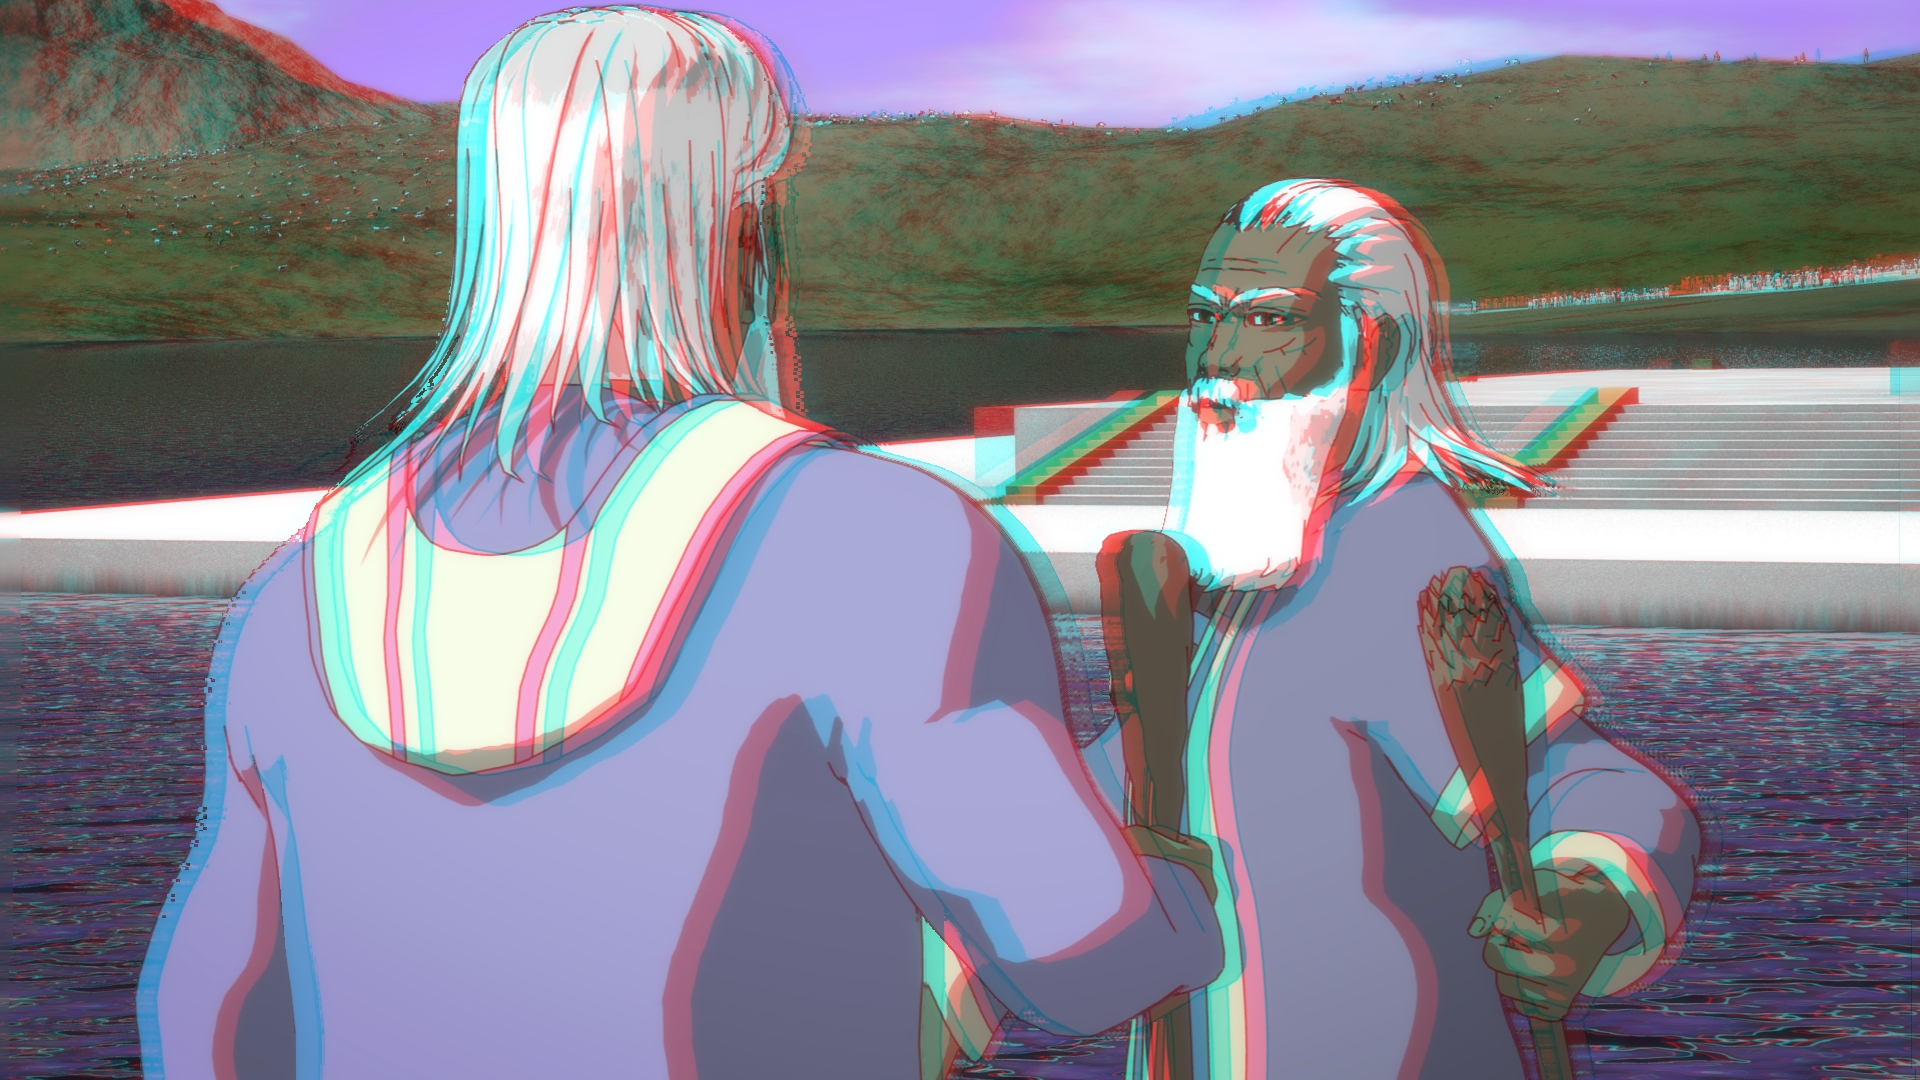 (ShiftWarping - 10 layers - Left and Right eye derived from original frame)
What you are looking at is a result purely from Blender's compositor. Through the years, I was taught various means of getting a 3D result in Blender, without having to do multiple renders.
Today, with the best result yet, it is time to propose!
- A new feature.
A "2D to 3D" node.
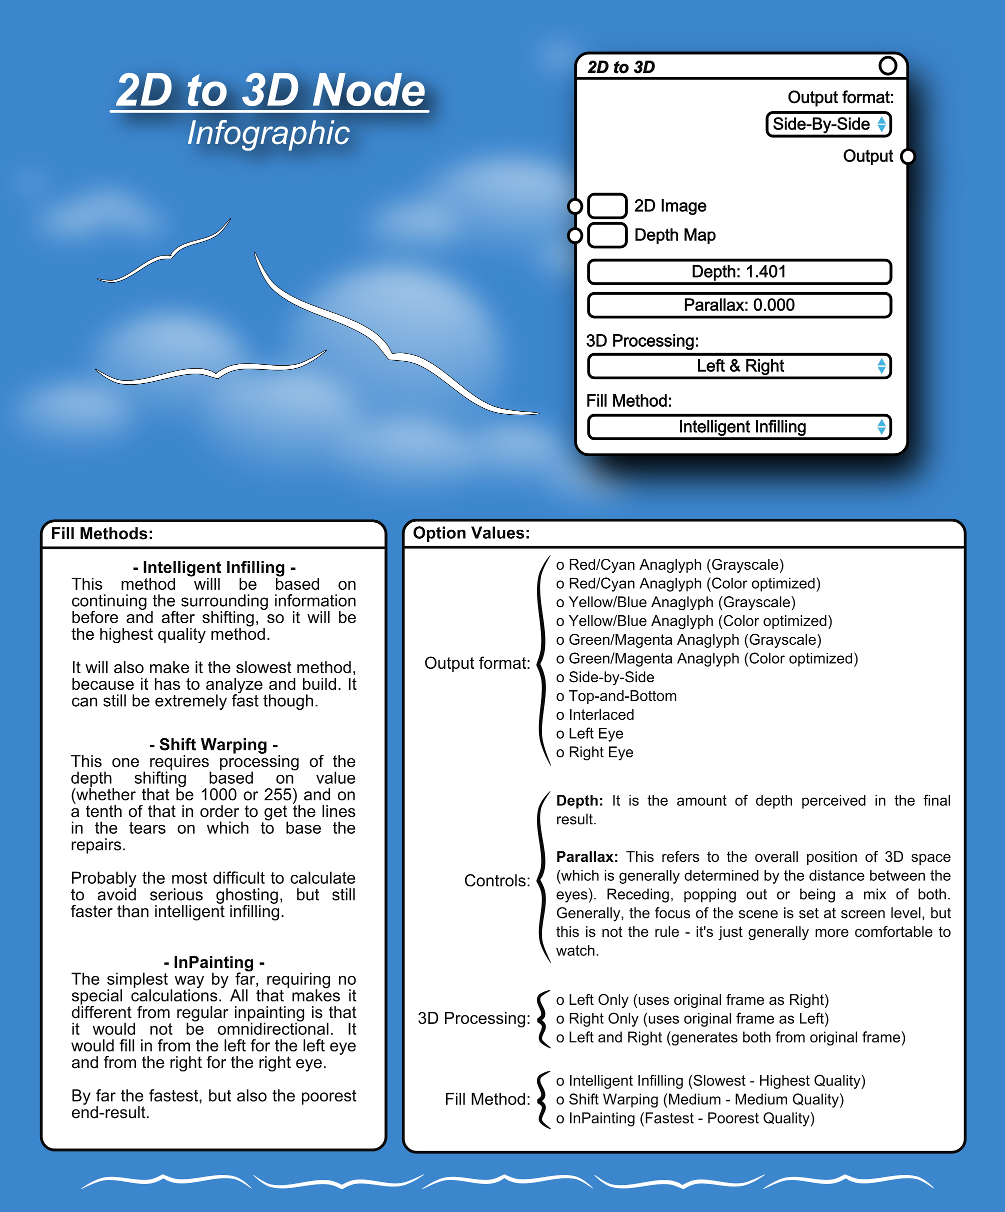
A compositing node for converting 2D to 3D based on depth (mist pass)
The method is fairly simple:
- The depth map is used to have Blender simply move every corresponding pixel of the frame according to the depth information it is on (white the furthest and black static). Not at all like the displacement node that blocks movement - it has to take a "layered" approach to building the new image.
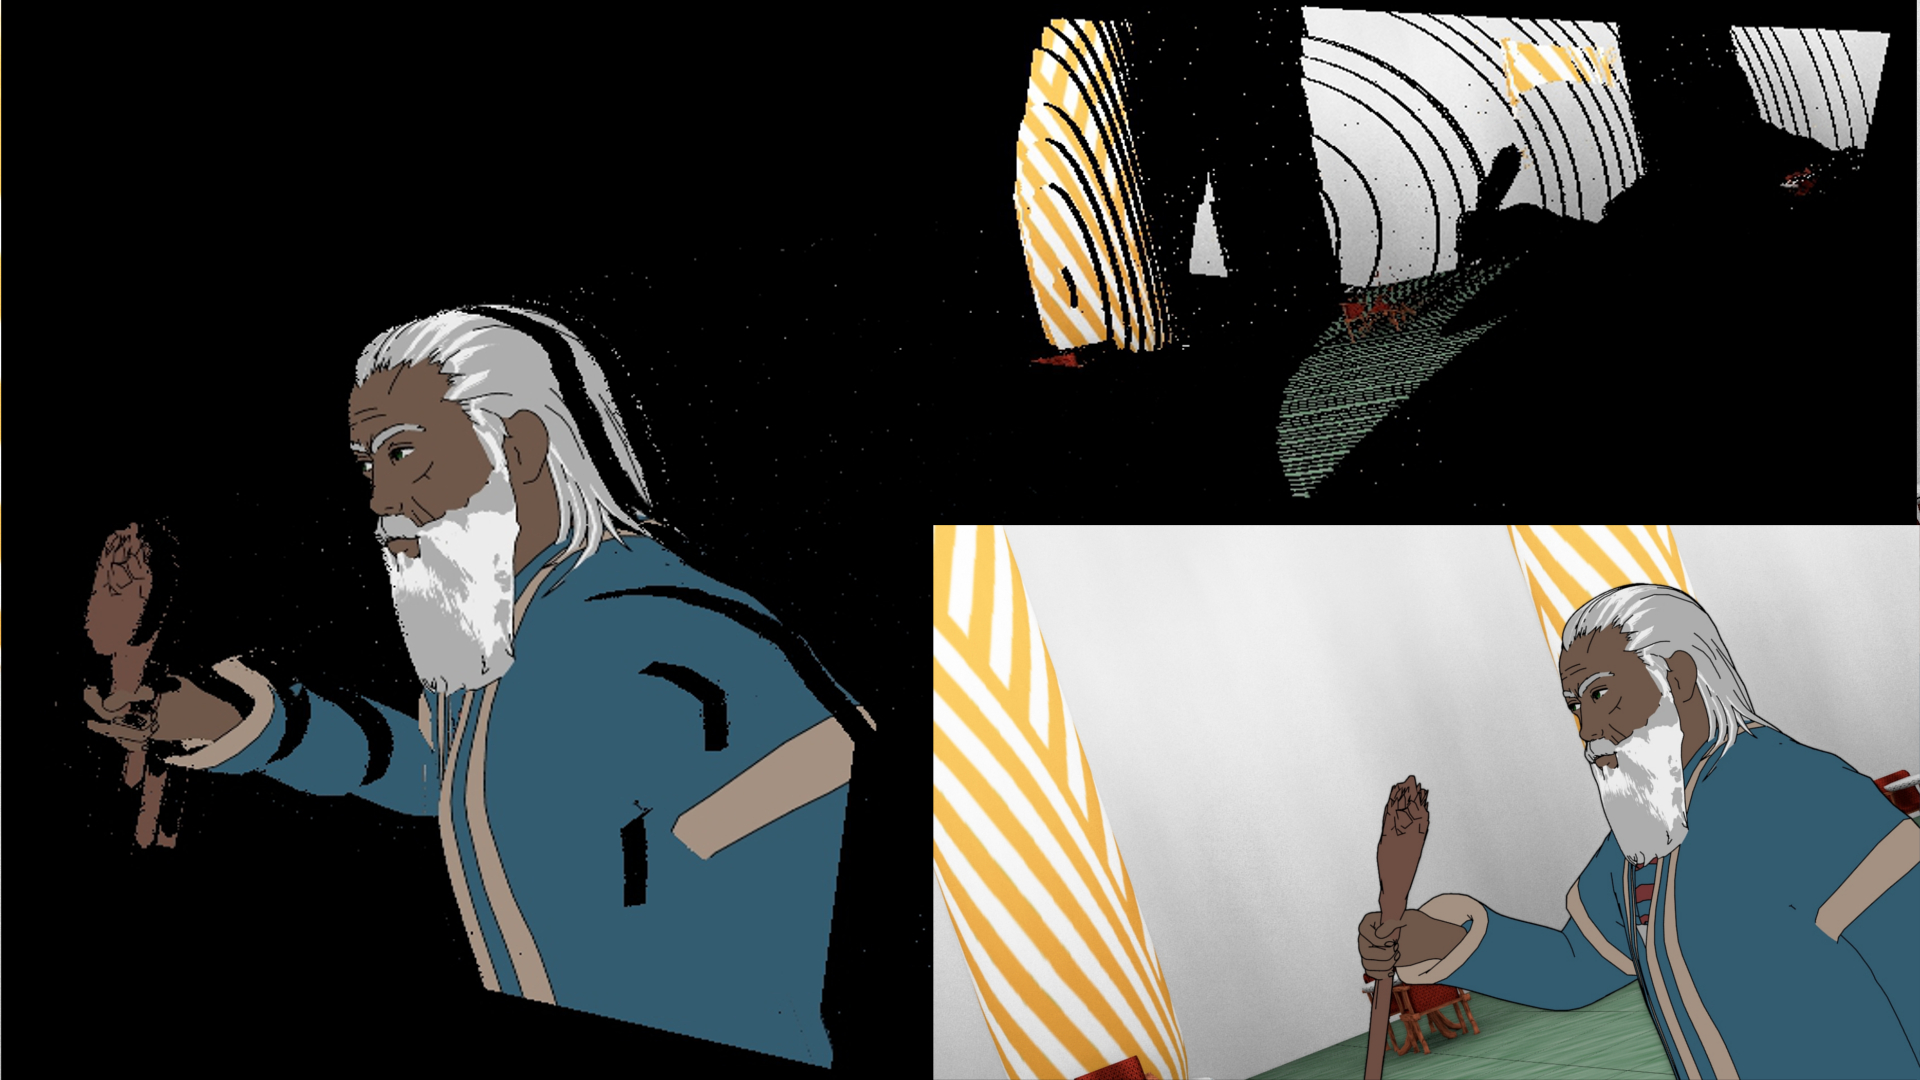 200layer example in the ViewPort with the original frame
There is a lot of information missing from the images produced.
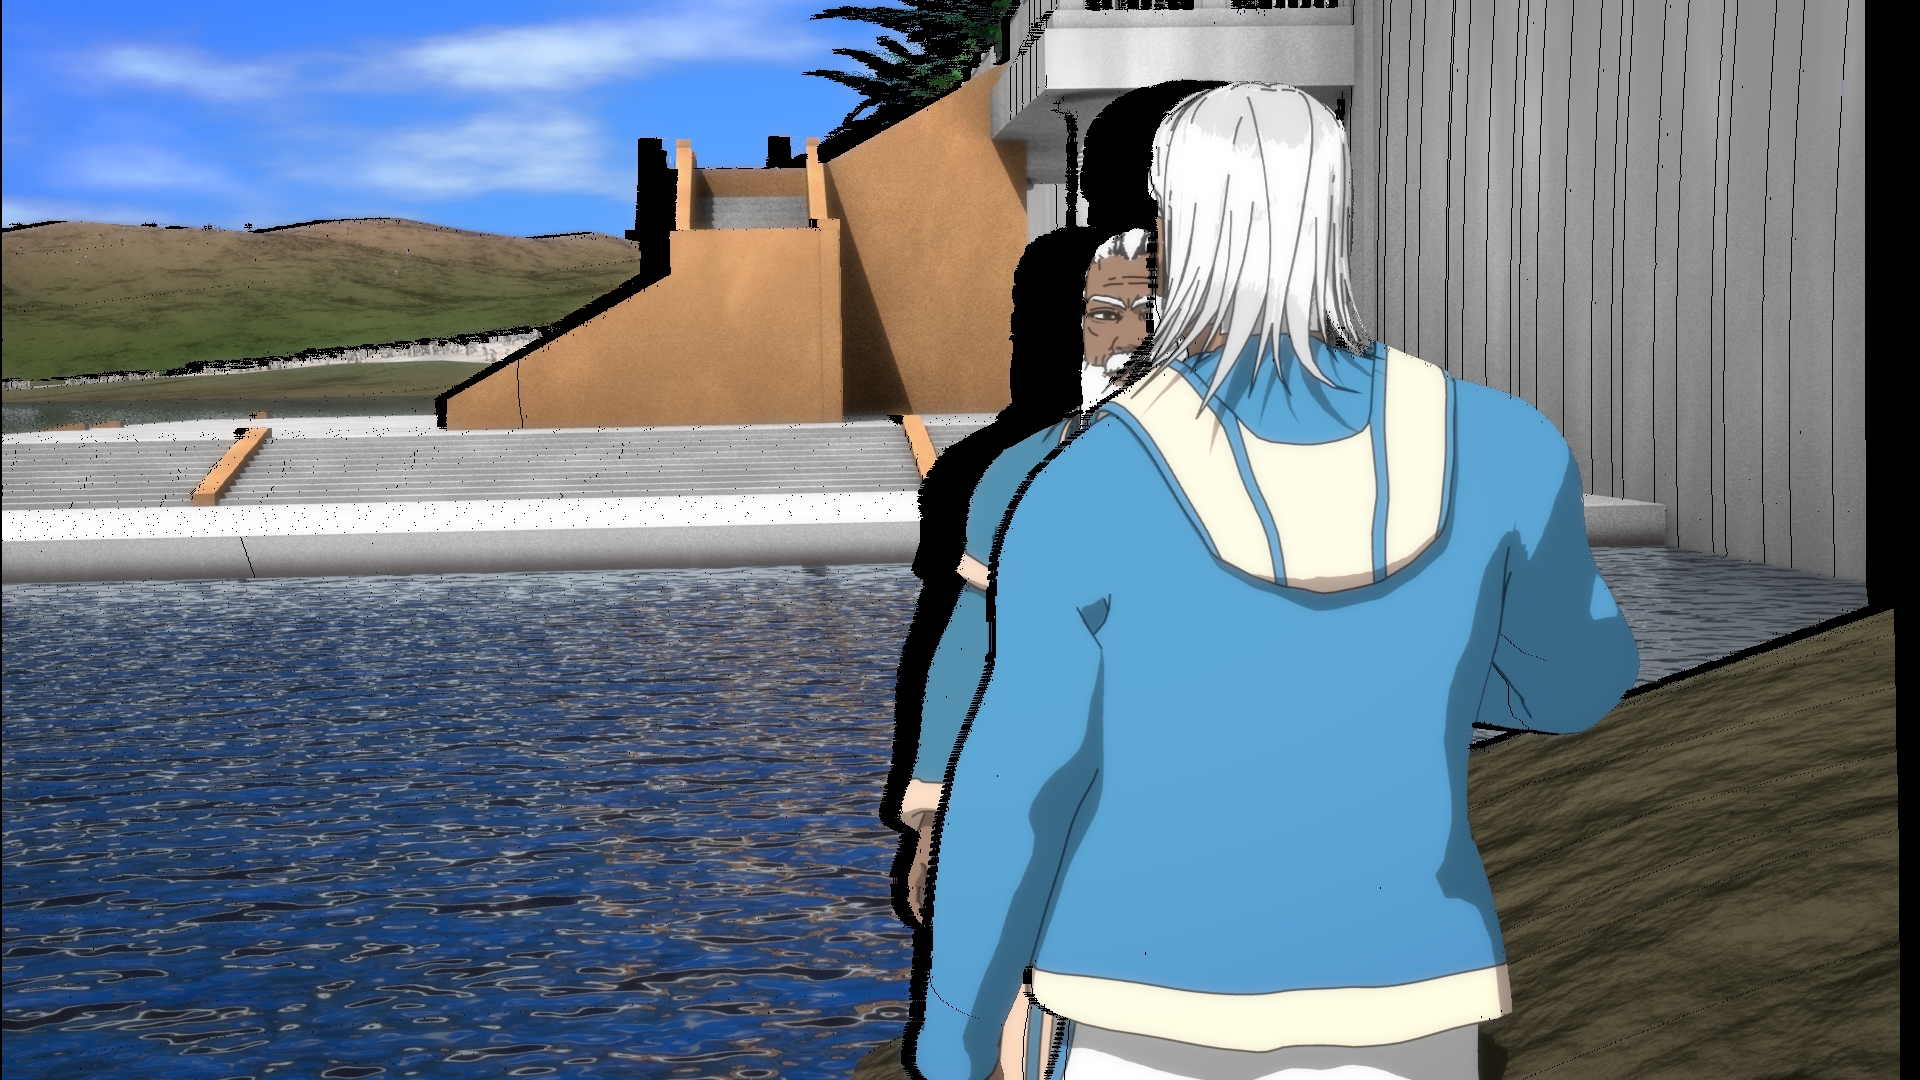 Only left eye distortion method.
If both eyes are generated from the rendered, it cuts the width of the black areas in half to be shared.
Over the years there have been many methods employed to fill these holes:
- the original frame
- rubber stamping
- the distorted frame shifted
- warping (like clay the frame is pulled over the holes)
- blurred filling (usually of existing information)
- deep learning
- pixel stretching, etc.
All of these, as they are, have some limitations. The key here is to find a method that works (almost) always, and this is where the approach of conversion gets really interesting.
I propose a few methods of filling these tears:
Intelligent Infilling
Using this directional information, inpainting these tears from the information available from both the distorted frame and the original can produce a phenomenal result. What this means in priority is that higher contrast lines continue over lesser contrast lines and gradients and solid colors will simply be continued. This will allow the tears to be filled in almost invisibly with basically no need for temporal coherence (which already exists in the video itself). The biggest plus of this method is a high quality 3D image.
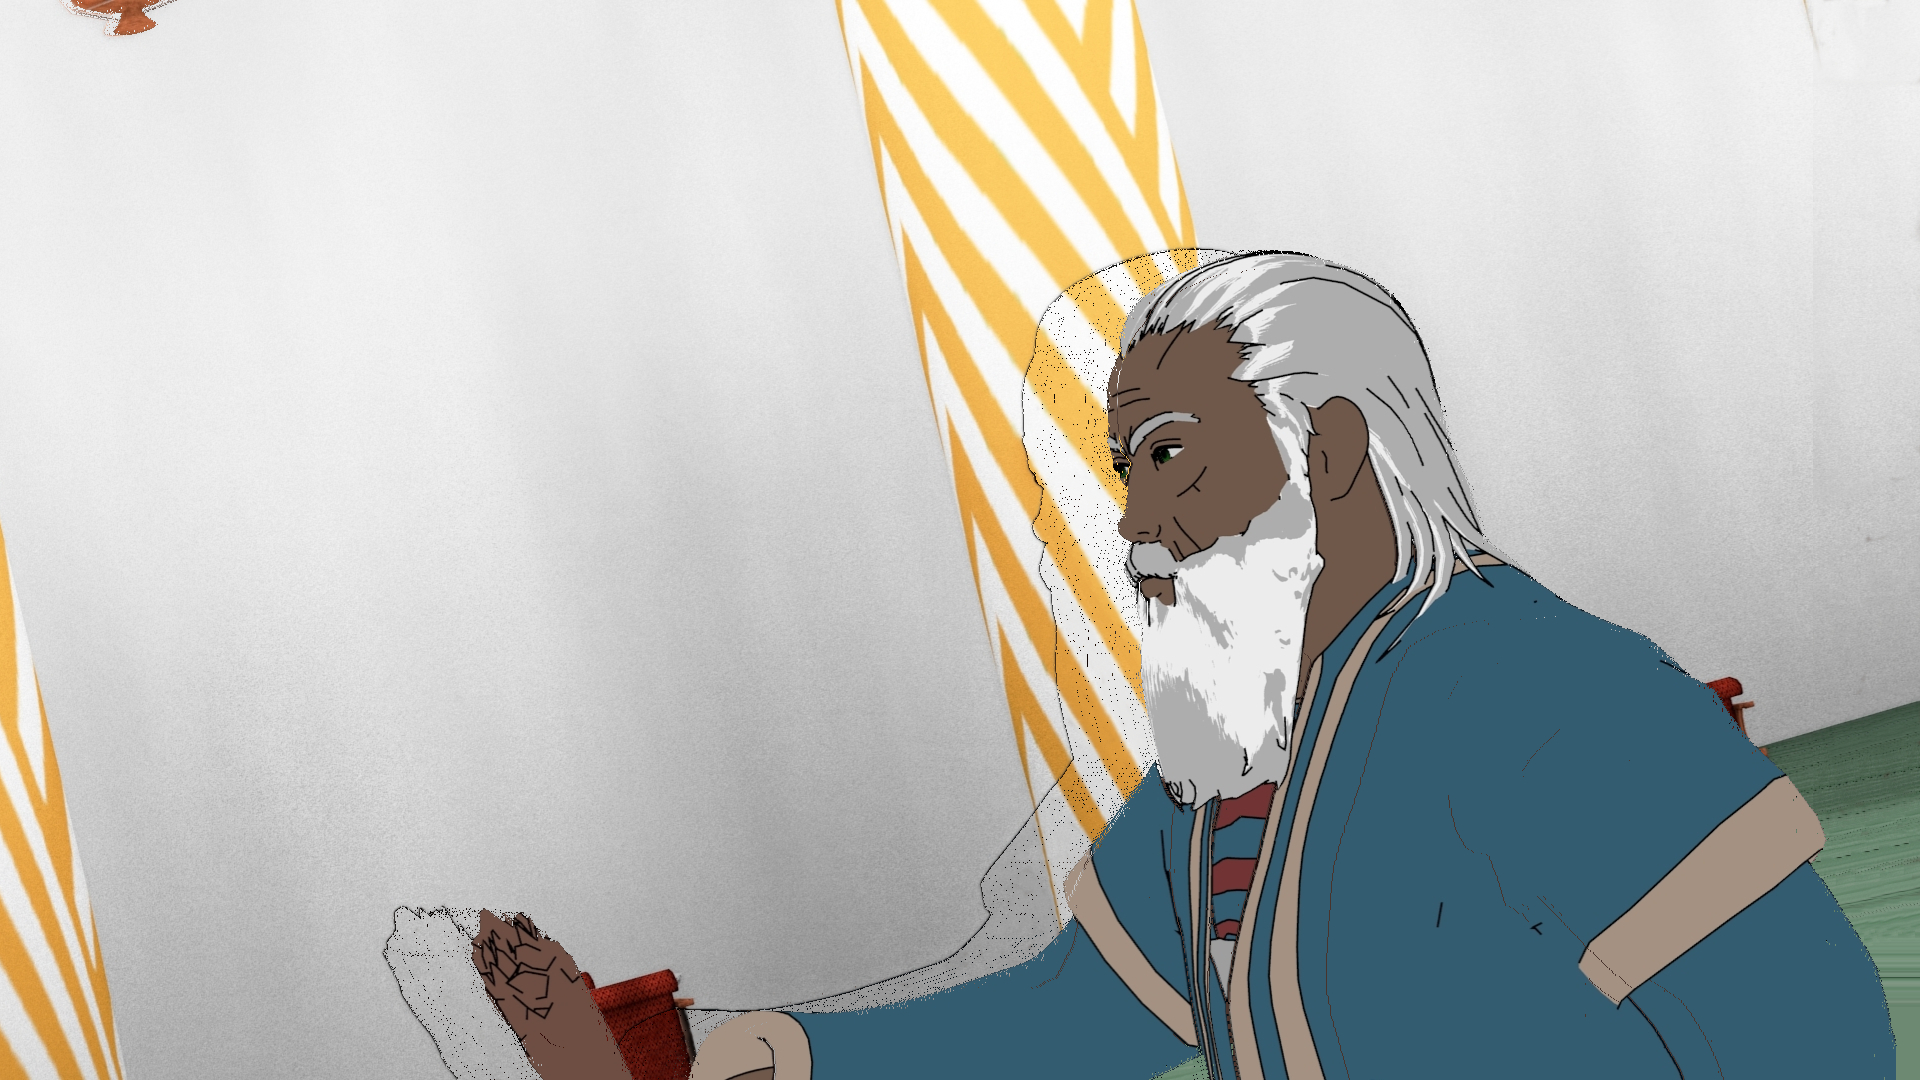 Freestyle bleed artefacts left in to show the area affected and intelligent filling illustrated. Only existing information was continued.
Handpainted in Gimp and composited in Blender.
Freestyle bleed artefacts left in to show the area affected and intelligent filling illustrated. Only existing information was continued.
Handpainted in Gimp and composited in Blender.
Shift Warping
A personal favorite and the current method.
Because the way it is setup currently, there are only 10 slices. This means that AA and slight blurring to compensate for Freestyle, gives us lines in the tears. When inpainting these lines, they fill the gap with a glassy warping like effect that consists of maybe 5%-10% of the tear's width - if not less. This means very little existing info is needed to be stretched for these gaps.
This method is extremely comfortable to watch, except when objects are revealed.
The biggest pro of this method is that it is very fast and you don't need too fancy programming to get it to work right - just modify the inpainting for the method to work from the appropriate direction only.
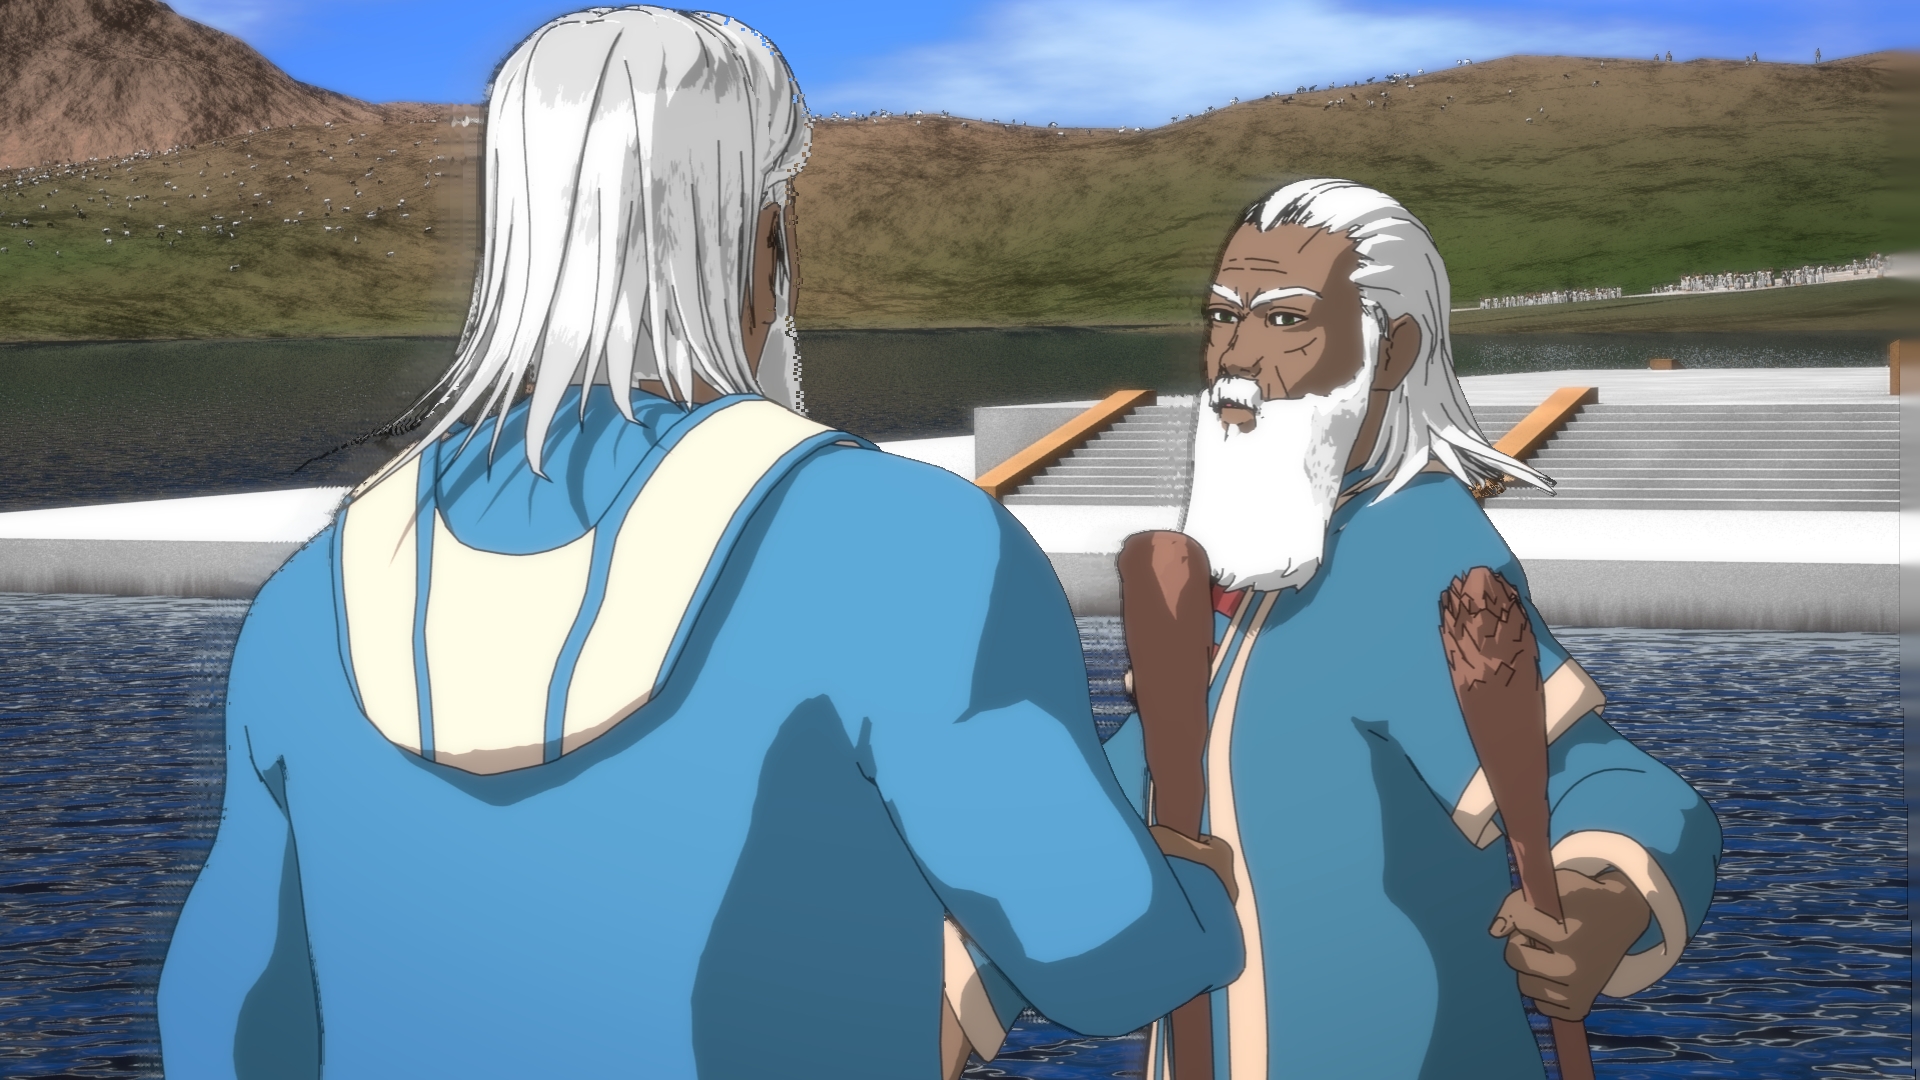
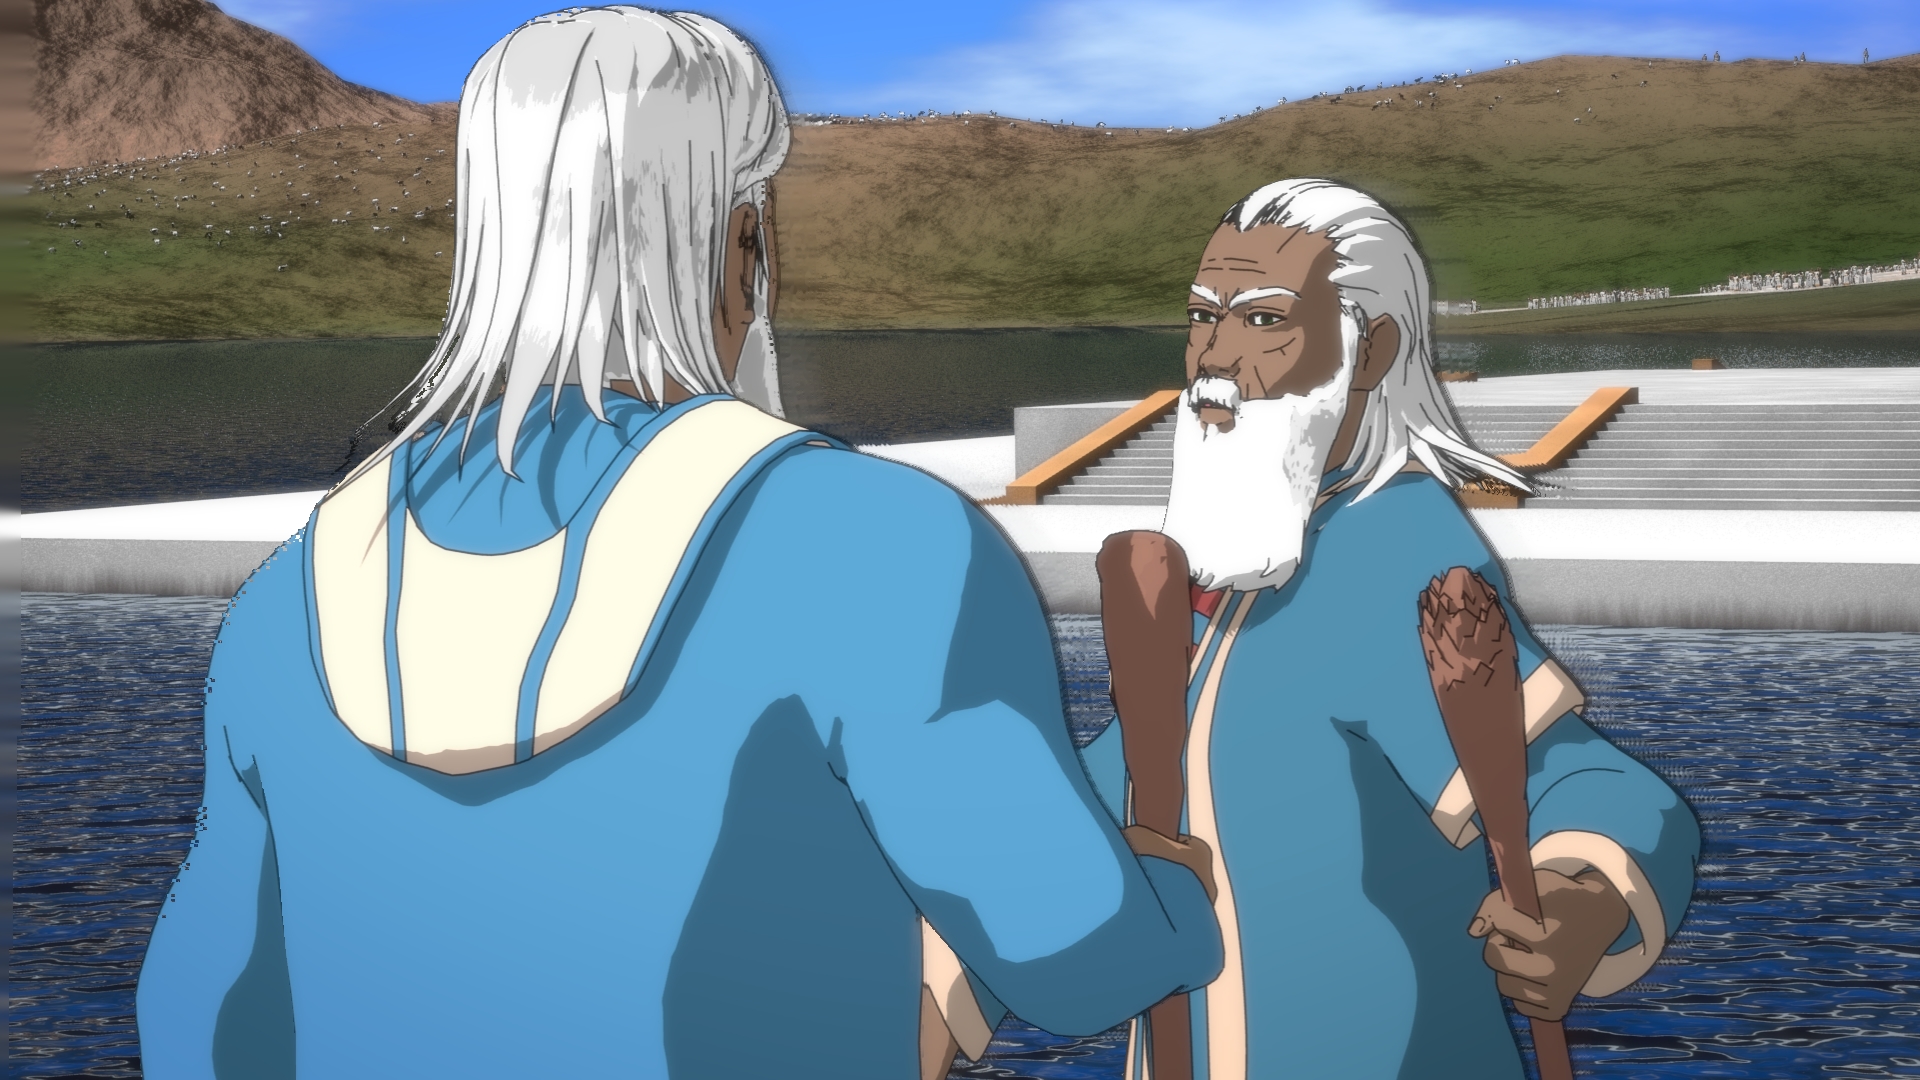 Left and right frame examples of ShiftWarping with 10 layers.
Clearly a very very effective method!
Left and right frame examples of ShiftWarping with 10 layers.
Clearly a very very effective method!
Regular InPainting
While it is the fastest, it will also produce overall the lowest quality image. It would fill in the holes based on the last line of pixels on the tear to simply bridge the gap. This does mean that the inpaiting - not pixel stretching - has to come from a max 180' from the side that the tears are - otherwise it will cause ghosting. This is easy to find as the tearing comes from the left for the left eye and from the right for the right eye.
This method is that it is extremely fast and should be the easiest to implement. Biggest problem of this method is that it is by far the lowest quality result - though should still be easy on the eyes.
What about the edge case? I put together the ones I found to be the most challenging from a coding level as well as a repair level.
The Frame Pillar - (fairly easy)
All of the infilling techniques suffer from the same problem - an incomplete frame. This can easily be solved by shifting the eye's background according to the depth settings and then fill in the gap using the chosen method.
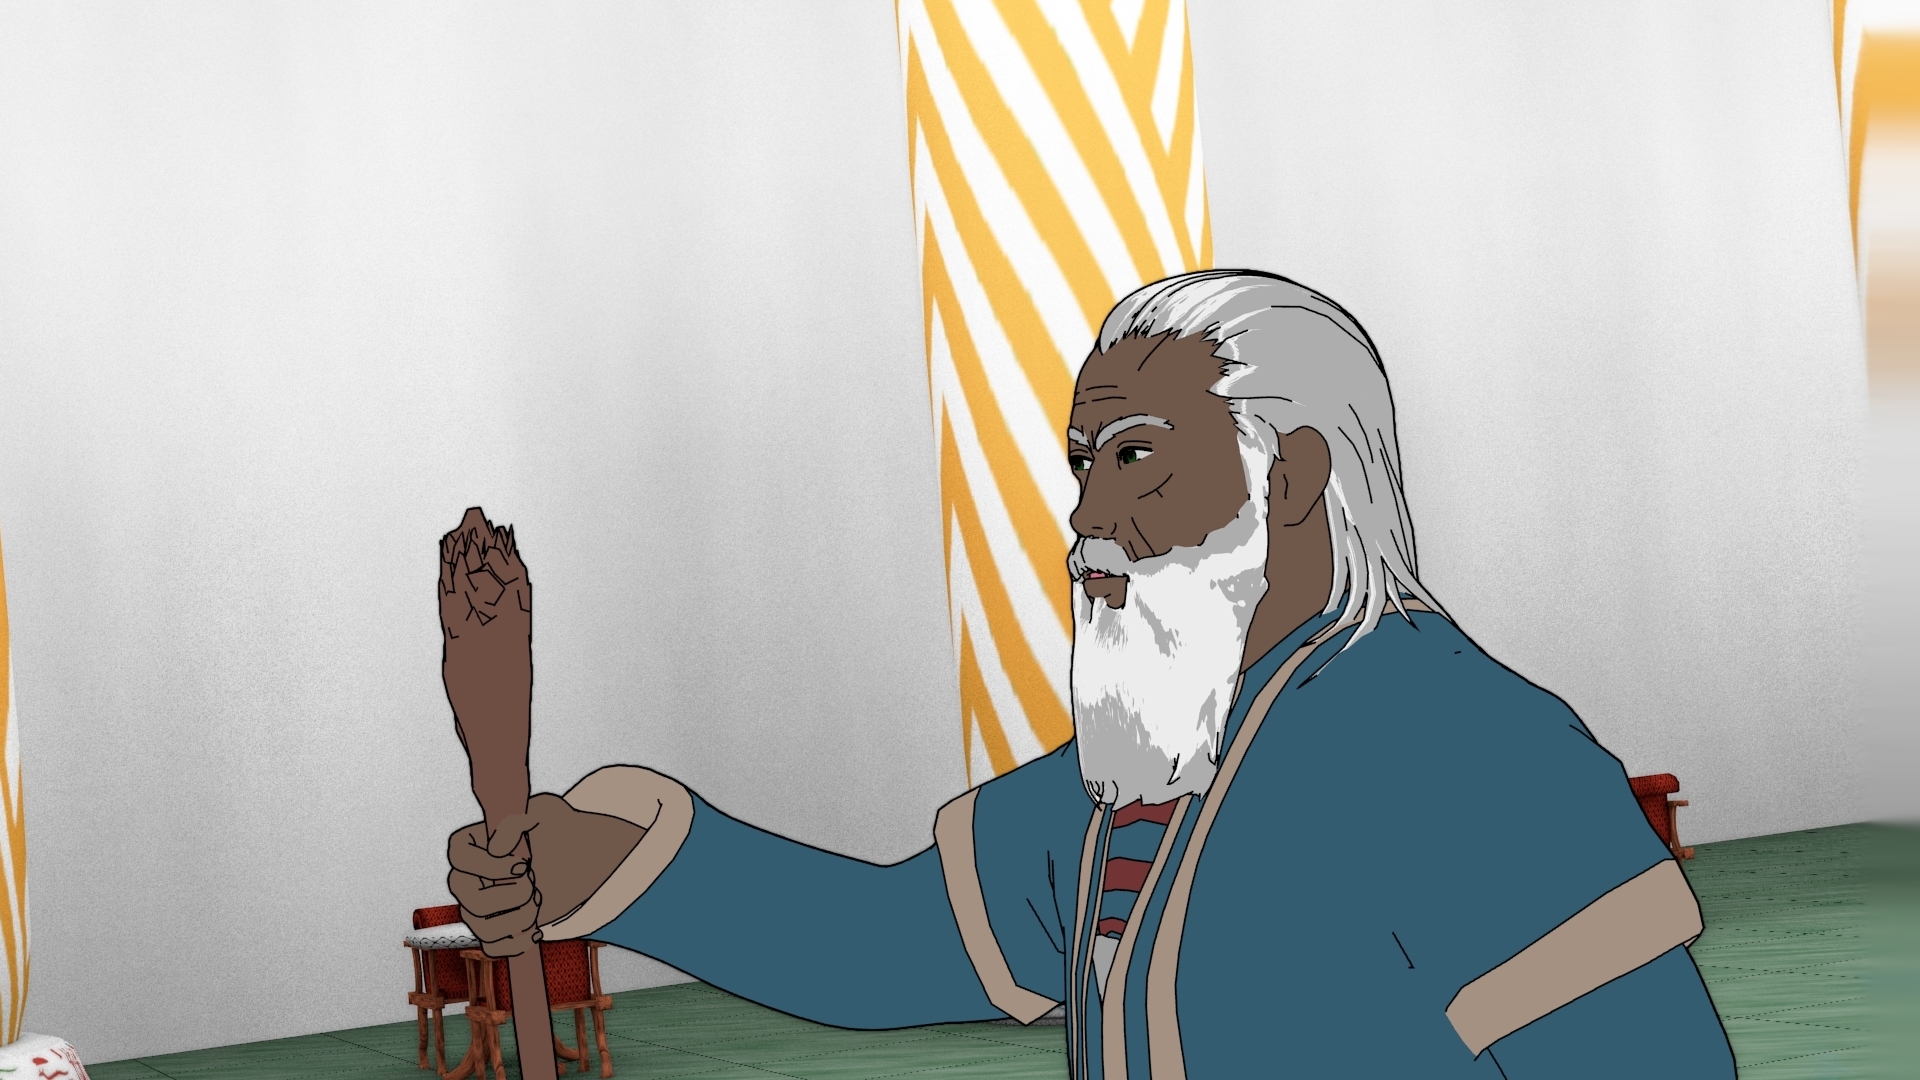 Background shifted and hole filled with inpainting
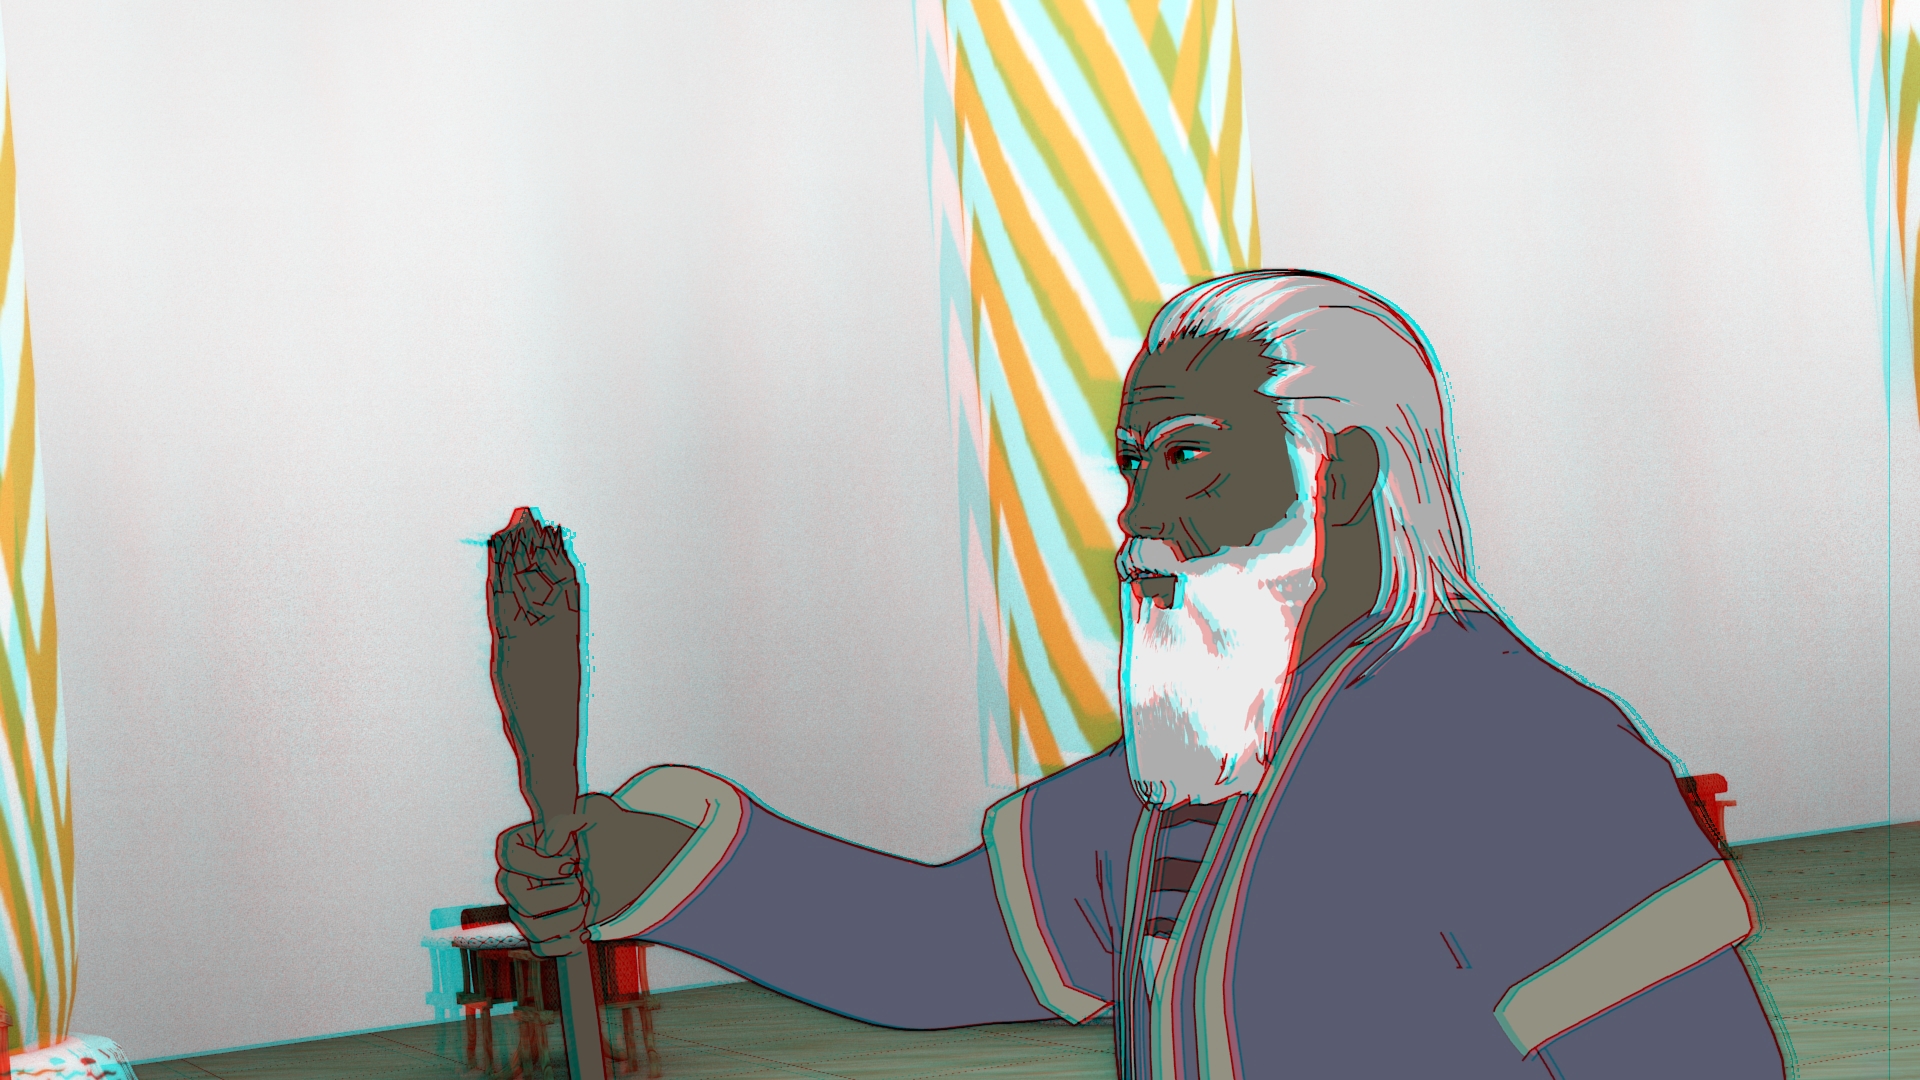 A Final 3D image of the same shot - For some reason there is a black line near the edge of the frame - from one of the slices and has been solved in the current node.
For this method it is imperitive to fill the frame first - the result in the opening should speak for itself in this area.
Seamingly Impossible Spaces - (tricky)
Similar to the frame pillar problem. Whenever you have a negative space with no possible filling information (after shifting), you have to go back to the original frame for the information.
The 10 slice method currently shifts over a lot of information and actually also shifts enough information for these spaces to be filled, meaning that there are no special repair techniques applied for it - they're filled in like the rest at the moment.
However, with a higher quality and higher density method, the information has to be inpainted from areas further back. I tried a method a while back that inpainted every layer completely to compensate for weird holes like this. The problem was that the layers are too far apart and Blender doesn't have a tool to know what was before and what was after and draw basic connections between them - this could prove extremely effective for no-info gaps.
The Slow Reveal - (Wow!)
The slow reveal happens when something that is partially occluded appears from behind an object, but because of the tears and the computer not knowing what to put in there, can really strain the reveal and it can be really really jarring on the viewer:
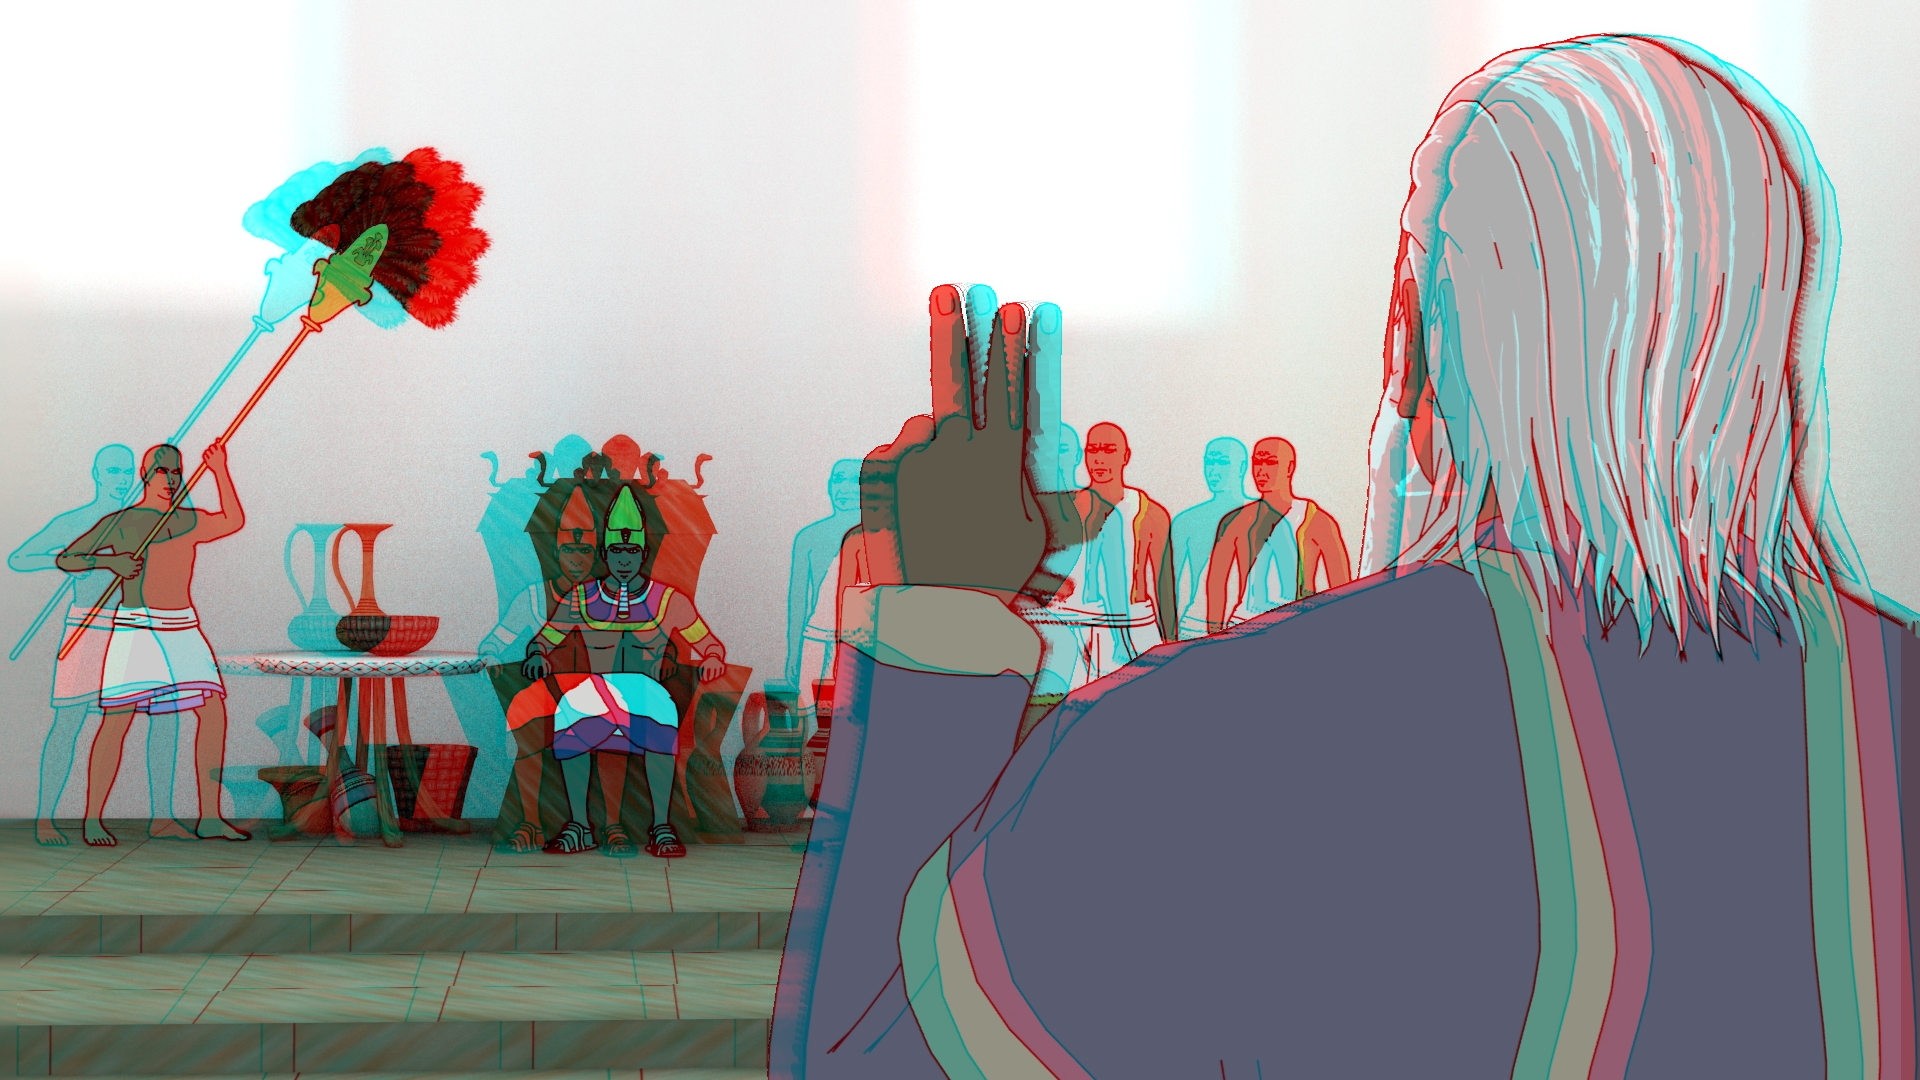 Most awful frame I could possibly pick to show how much of a problem it can be.
How it looks when shifting Moses forward quite a bit, reducing the tear size:
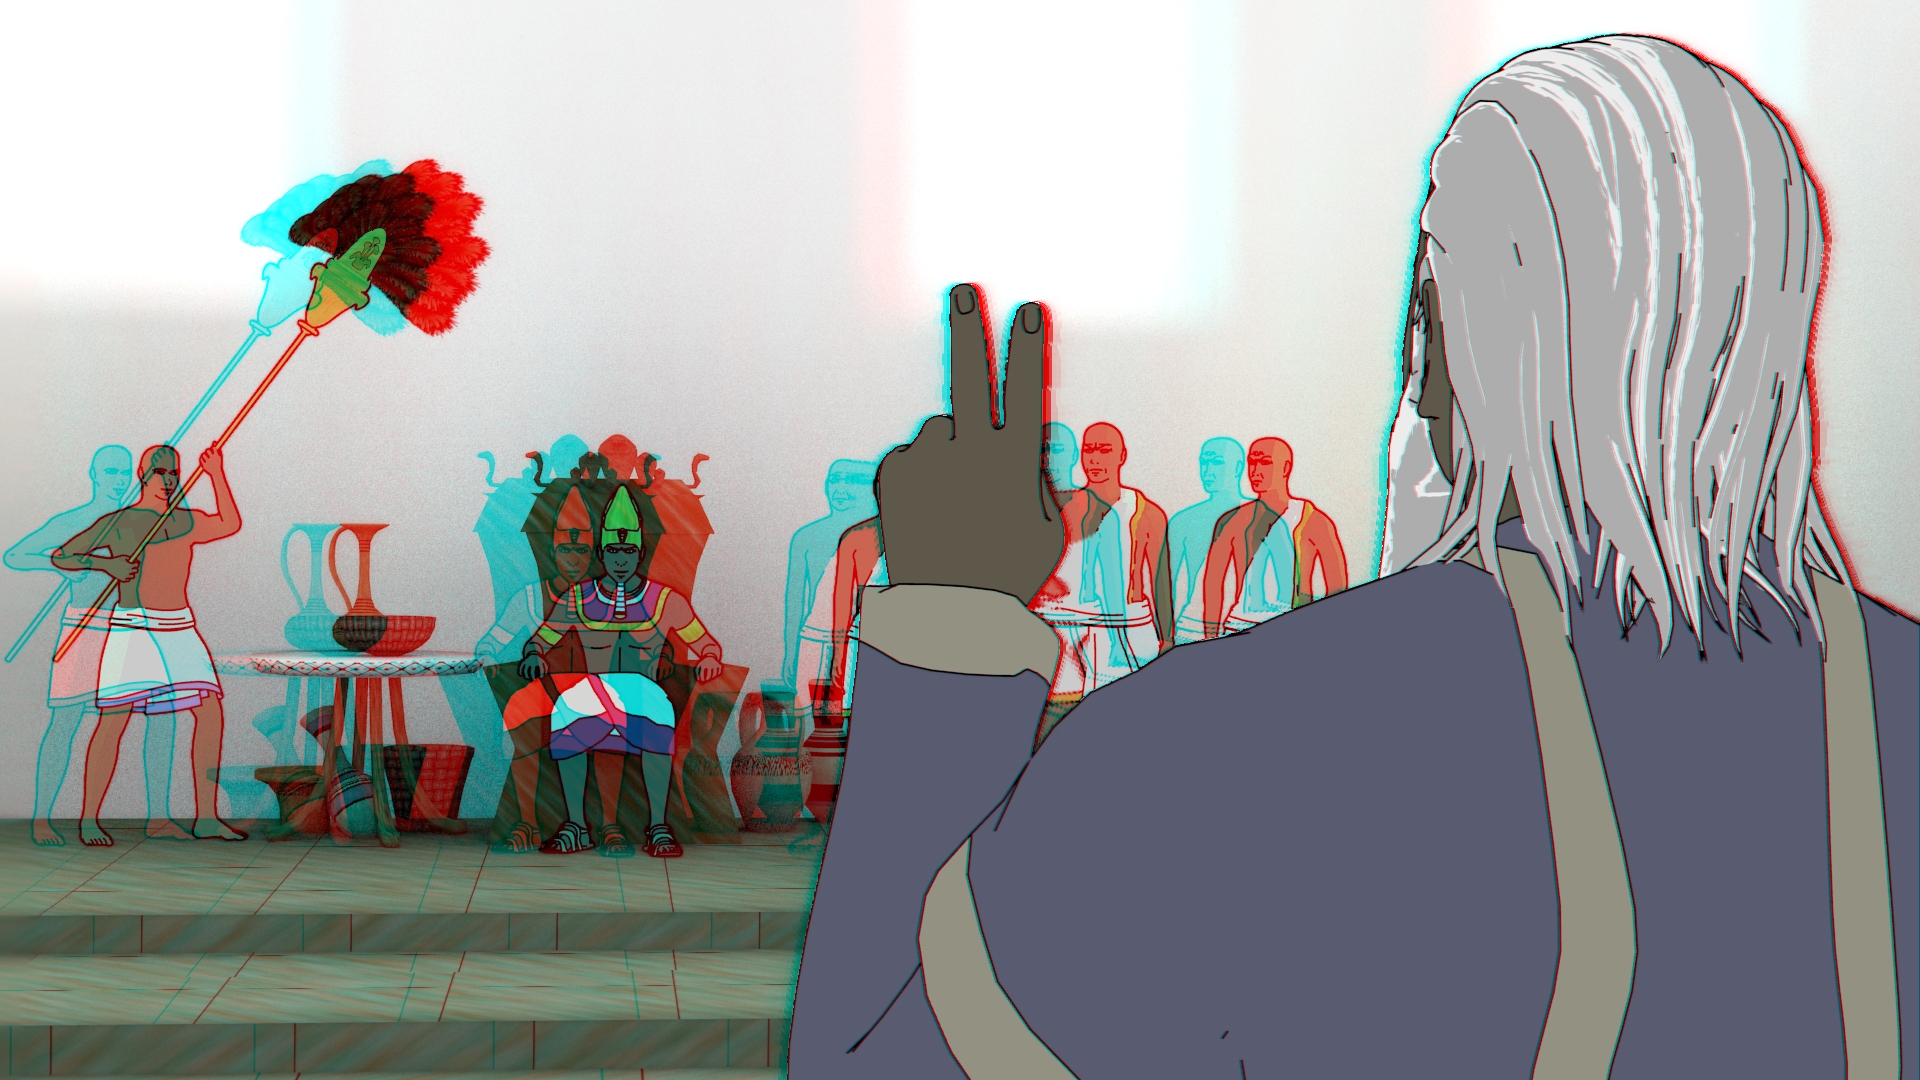
Like you can see, with the warping technique, this is partially solved, because using the existing information means that the pulling is severe, but is much more comfortable than pixel stretching:
 (Gimpel 3D - In general small gaps are a problem, not just for Gimpel, but it does prove that pixel stretching is not the answer - same thing happens in blender with attempts at stretching pixels)
I really do believe Intelligent Infilling is the best solution for cases like this and generally all cases, since the gaps aren't generally that huge, unless you have large open spaces.
I only have complete examples of the second method - shift warping. Of course, if coded, it will look much better, because this one:
- still pulls on the freestyle outlines (inpainting is omnidirectional atm)
- the warping isn't interpolated.
- just 10 slices - the coded version will have between 255-1000 layers meaning the warping will be a lot smoother.
The other methods can be included as speed options.
So, let's summarize with a mockup.
##Q & A
Don't you need special glasses for 3D?
Not for all methods. There are more and more glasses-free solutions coming on the scene - even ones especially for the smart phone. All the more reason for faster methods, more- and higher quality content. Even some of the newer TV's have glasses-free options.
What about Render times? 3D takes extremely long to render, doesn't it?
With this method, not an issue. Let me give you an example. True 3D means double your normal render times (2 eyes, 2 frames). Your render takes an optimistic 3mins per frame (2D). That means, a true 3D frame will take 6mins: 6mins = 360 seconds 3mins = 180 seconds Thus, we'll have 185 seconds for a render conversion. Giving us a 48.61% increase in speed for 3D! Just apply that to a simple 1000 frame sequence: 100 hours (6mins/frame) vs 51 hours (3mins 5sec/frame)
A very big difference. All the more reason to do it well! Plus, you see your results in almost real time, so you can adjust the depth as you see fit through-out the project!
Won't this clash with the existing Views option under render settings?
No, because this is a post processing node. It's totally separate.
What about other forms of infilling or inpainting? What makes you such an expert at what is best?
Beyond what others have done, I have also done a lot of work on this over the years, which you can check out in this tutorial of an earlier version (not recommended, but interesting read): pantherdynamics.yolasite.com/blender-tutorials.php (just scroll down to it). For the current node group that's higher quality - link at the bottom.
Okay, but Eevee will be so fast, can't you just do true 3D instead?
If you're really pushing Eevee for quality, the rendering will still be slower than the conversion, so it's perfect for Eevee too!
This also enables you to convert older projects if you have the OpenEXR's or the depth maps rendered out. Preferably the mist pass though.
Why the mist pass specifically?
It considers the shaders as well. It does not just take physical modelling into account. This means you can do transparency, including water and glass.
That's great and all, but YouTube removed the 3D check box. How do I upload it in a way for YouTube to understand it? The metadata they recommend doesn't work...
I am so glad this is brought up, because I would like to suggest that the File Output node as well as the metadata section, get stereoscopic check boxes related to each format it supports. Of course some 3D formats don't get it, such as Anaglyph, because it is packaged for viewing. Other methods get packaged for on-the-fly conversion to view - these need metadata as it depends on the container (like matroska and H264). You can watch this video - it shows the FFMPEG commands for Matroska and H.264: youtube.com/watch Check the description as well as the accompanying post for some more info: pantherdynamics.yolasite.com/panther-dynamics-blog/uploading-3dsbs-content-to-youtube
Also, give it time to get recognized as 3D - at least 24 hrs.
The elephant in the room, VR. Can this be applied to VR?
Yes it can. I had to test it with the cross-eyed method, but it absolutely works. Because the demo I have is only 10 layers, the detail of depth is very choppy (VR is huge), but you can experience the depth well.
About depth - I have found that receding-only looks the best, but I know for some really great interaction, "throwing things at the viewer" will require pop-out. Keep it to a minimum so that the 3D aspect does not become gimmicky. I did a test with a sphere volume full of cubes:
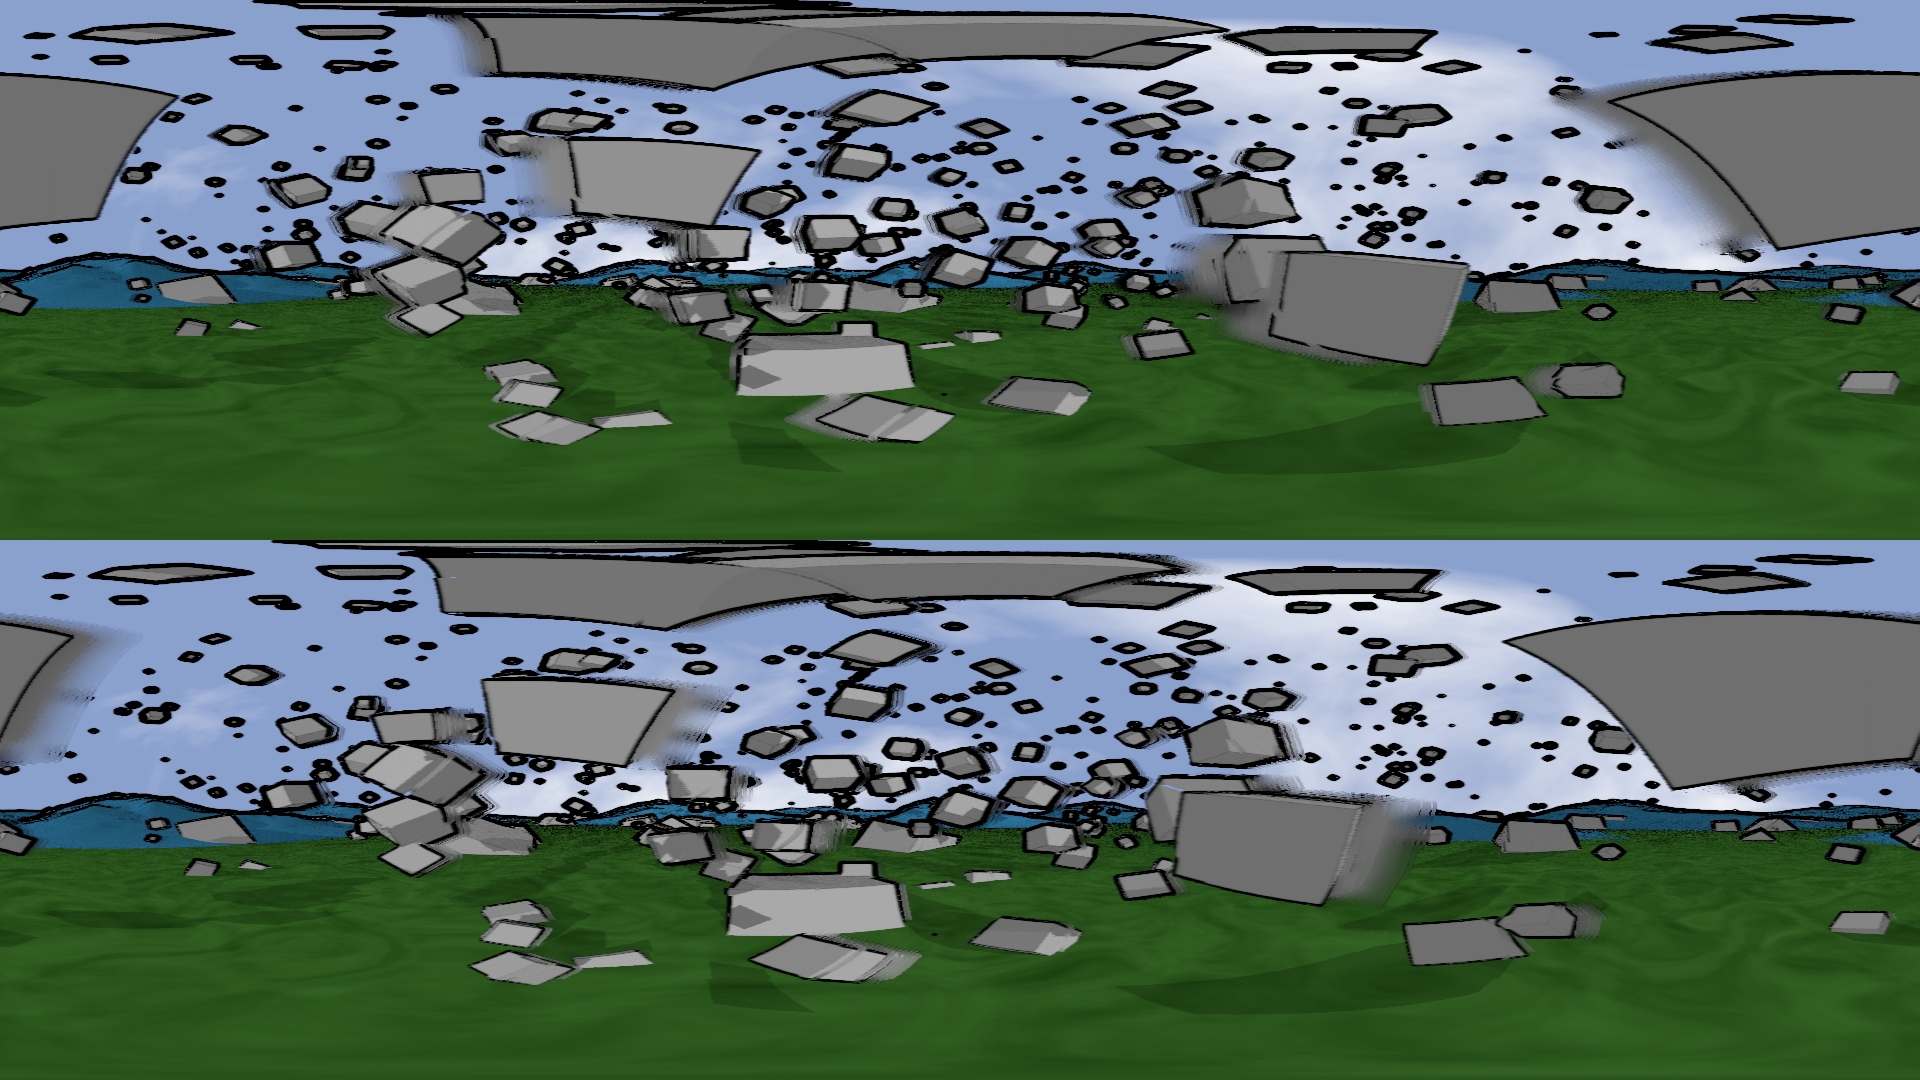 (Extremely rough - view at own risk)
The cubes that were pop-out or very close made my eyes try to focus on them and I'd lose the cross-eyed view. So I encourage two things for Pop-out stuff:
- Thorough testing for it's focus and limits with a headset
- Keeping it to a minimum anyway
If it be set to VR it will use slightly different settings. VR is 360 in 3D. Wrapping for the X-axis has to be turned on or you will no longer have a seamless result. Seriously, everything has to have X-axis wrapping (no background correction needed here) and then be output as Top and Bottom (Top being left and Bottom being right).
Because I am not an expert at this, but this is my conclusion: If VR is selected for the output, process depth the same way, but with wrapping turned on so that it remains seamless (watch out for issues with the seams where correction takes place, so that it too remains seamless) and output it to Top and Bottom (squeezed).
As for the metadata, it can be injected using the program mentioned and linked to in the question on YouTube uploads above. Or if Blender includes these capabilities in the future, the metadata section under the output tab.
And that's it! I thank you for your time! Do remember that you are responsible for your own healthcare and for your own decisions. If you do participate or use any of the programs or information in the proposal, you do so entirely at your own risk.
Have a great one and GOD bless you! (^^,)
Current 3D method downloads and other awesome node groups: pantherdynamics.yolasite.com/downloads.php
Images are (C) Marius Oberholster. For more info about Exodus 7-12, Kjv, check out this link: bibleanimations.yolasite.com/blog.php and this vlog playlist: youtube.com/playlist
0 Comments